Creating Perks
Perks are employee benefits you create and assign through PerksPe. Each perk has a value in PEP Coins — a digital currency employees can redeem via their RuPay card at 12 million+ merchants across India.
What is a Perk?
A perk is any benefit you want to give employees, such as:
- Food allowance (monthly meals)
- Fuel allowance (petrol/diesel reimbursement)
- Medical benefits (health-related expenses)
- Anniversary rewards (birthdays, work anniversaries)
- Rewards & Recognition (performance bonuses)
- Others (custom benefits)
Each perk is assigned a PEP Coin value, which employees can spend like real money.
How to Create a Perk
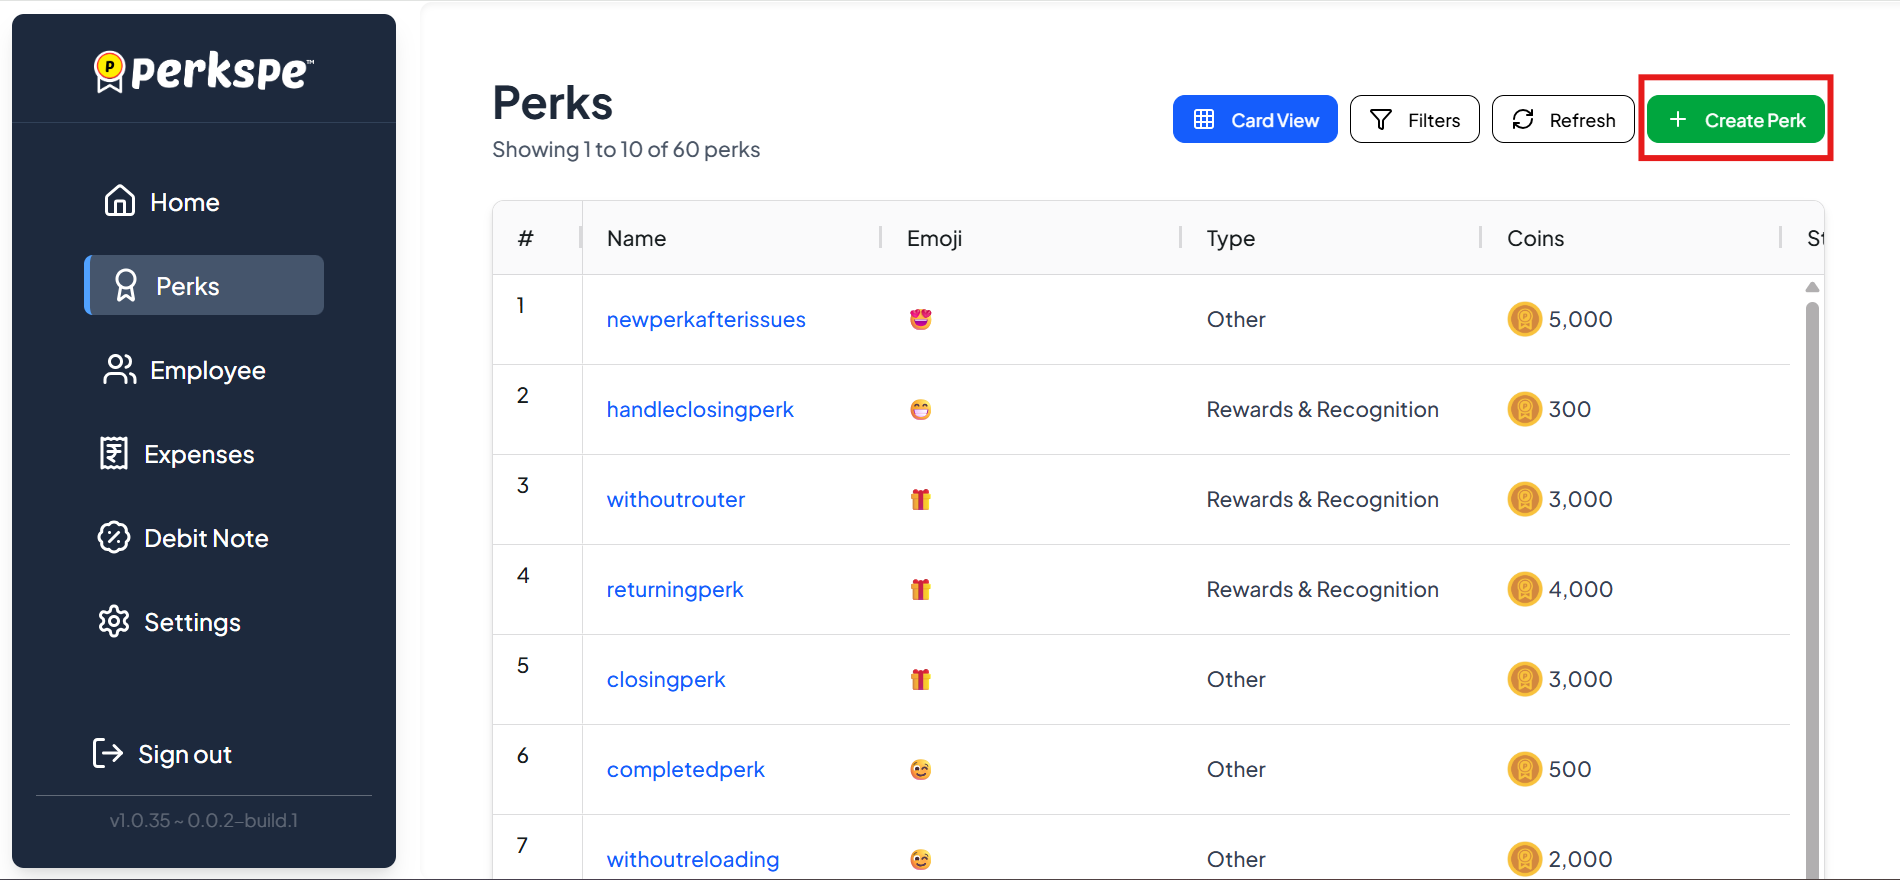
Step 1: Go to Perks
From the sidebar, click Perks.
Step 2: Click Create Perk
Click the Create Perk button (top right).
Step 3: Enter Basic Information

Fill in the details:
| Field | Description |
|---|---|
| Name | Full name of the perk (e.g., "Monthly Food Allowance") |
| Emoji | Choose an icon (e.g., �, ⛽, 🎂) |
| Short Name | Abbreviated name (e.g., "Food") |
| Coins | PEP Coin value (e.g., 100) |
| Type | Category of perk |
Available perk types:
- Food
- Medical
- Fuel
- Anniversary
- Rewards & Recognition
- Others
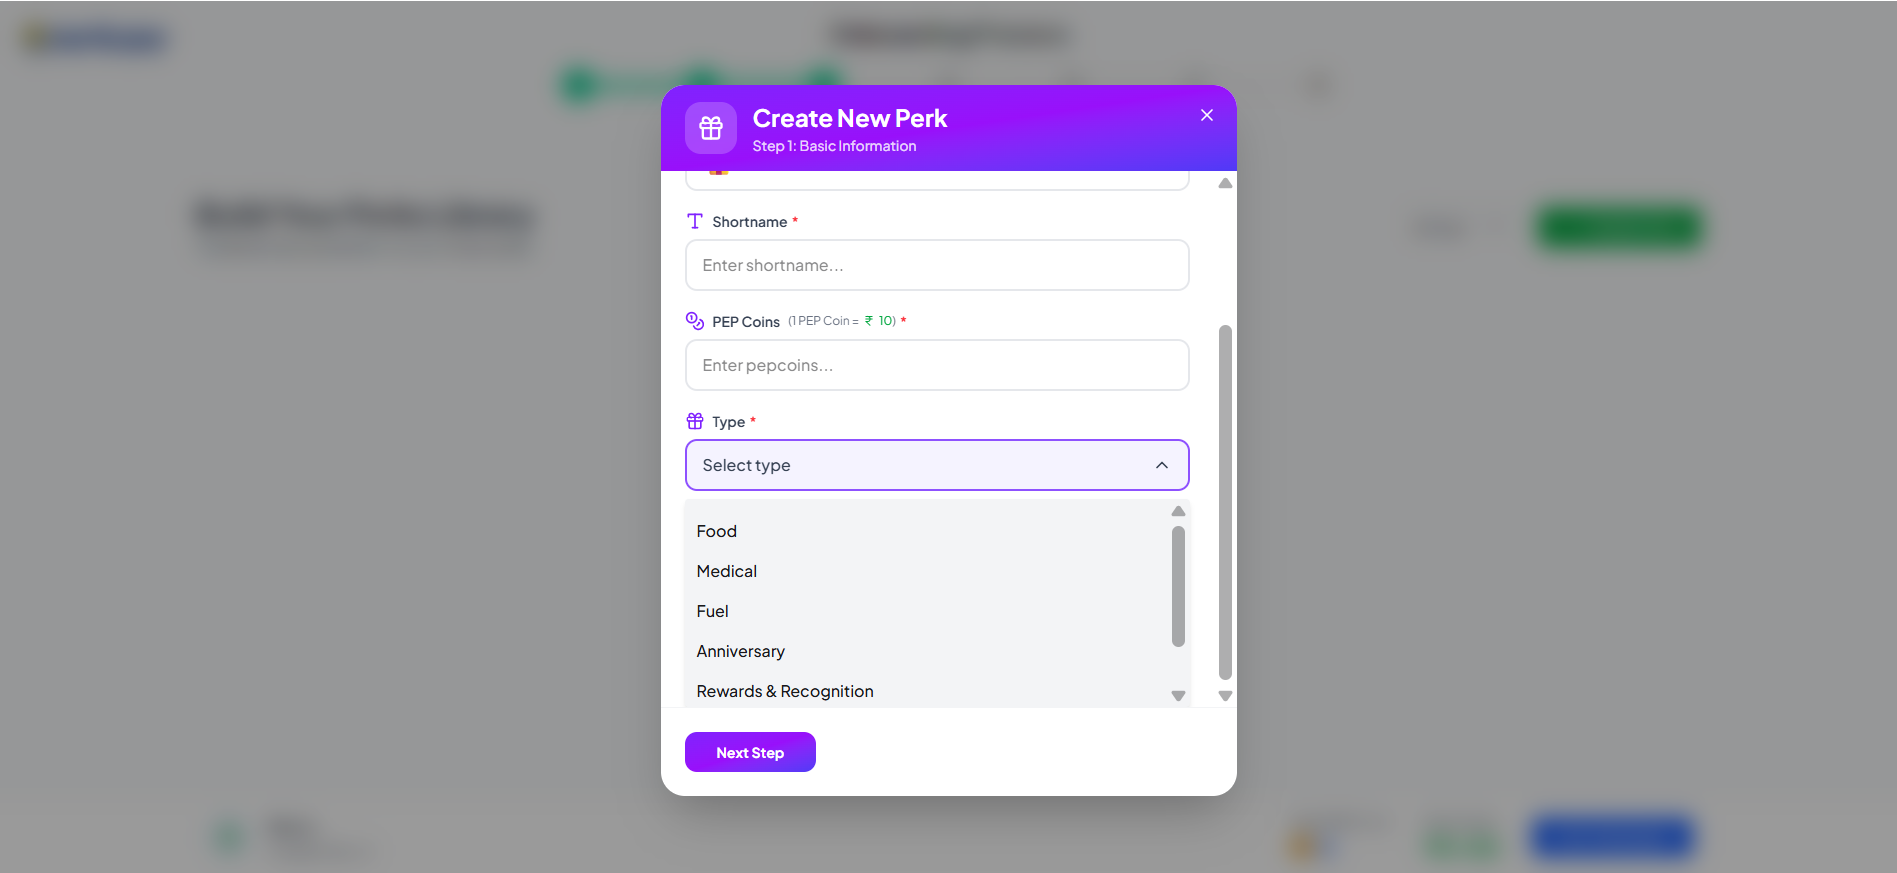
Click Next Step to continue.
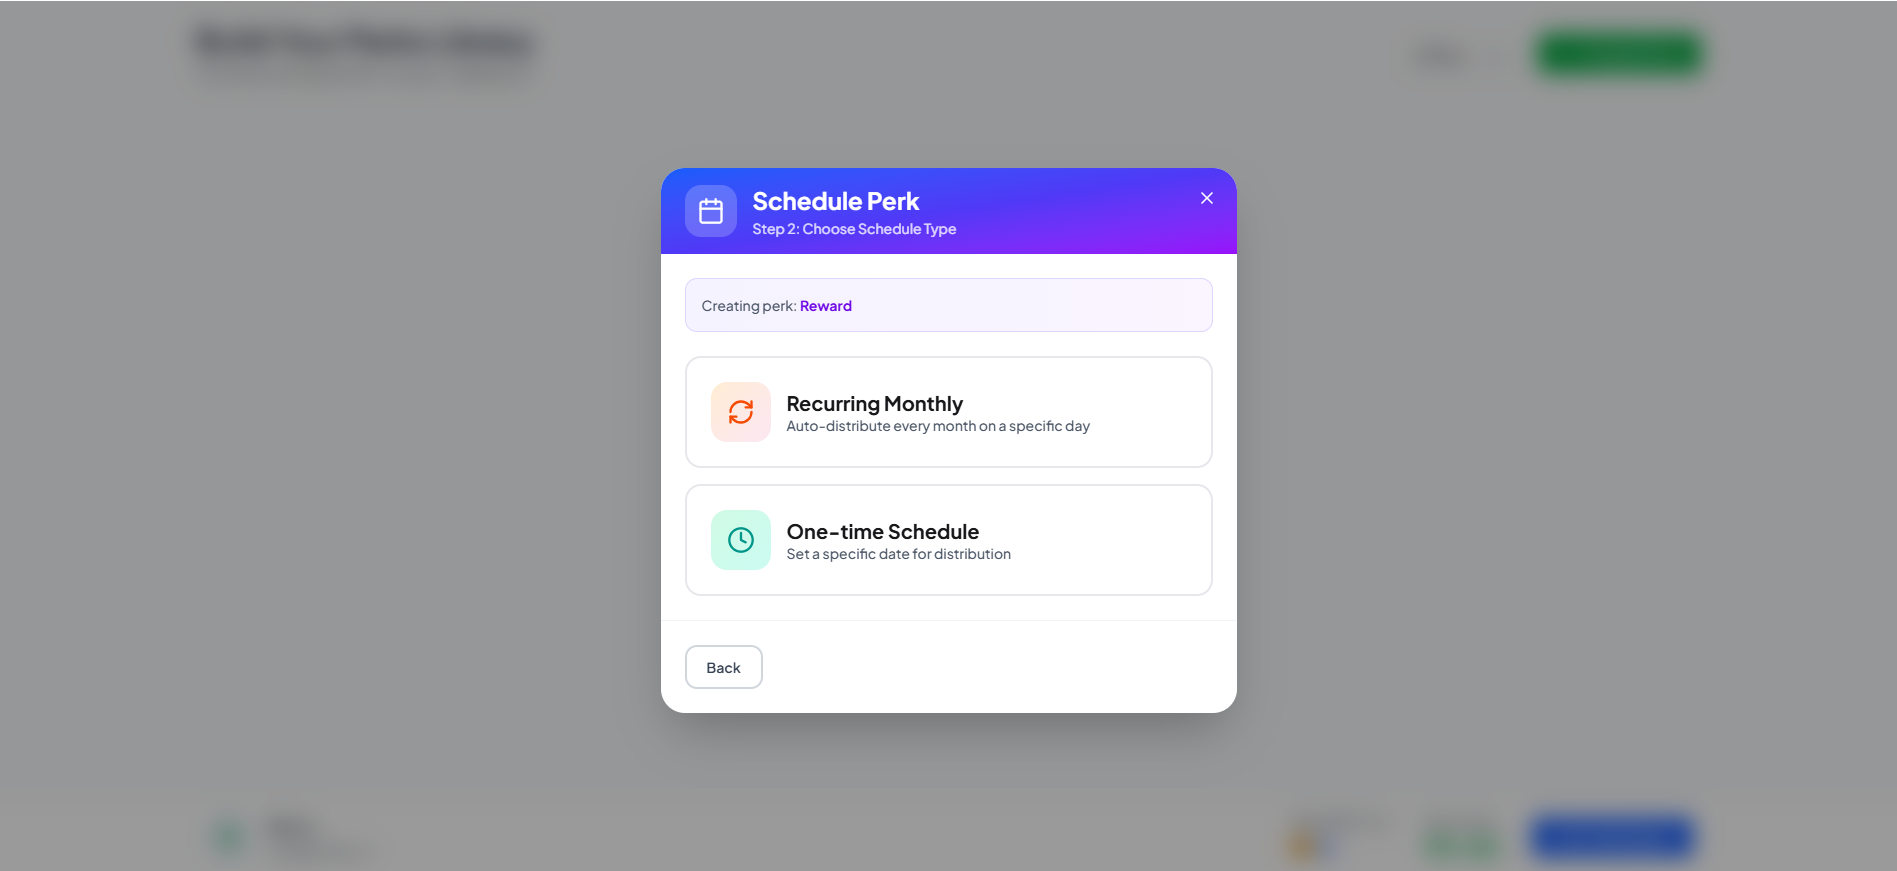
Step 4: Set Up Schedule
Choose how and when the perk will be assigned. For standard perks (such as Food, Medical, Fuel, and Others), you must first select the schedule type:
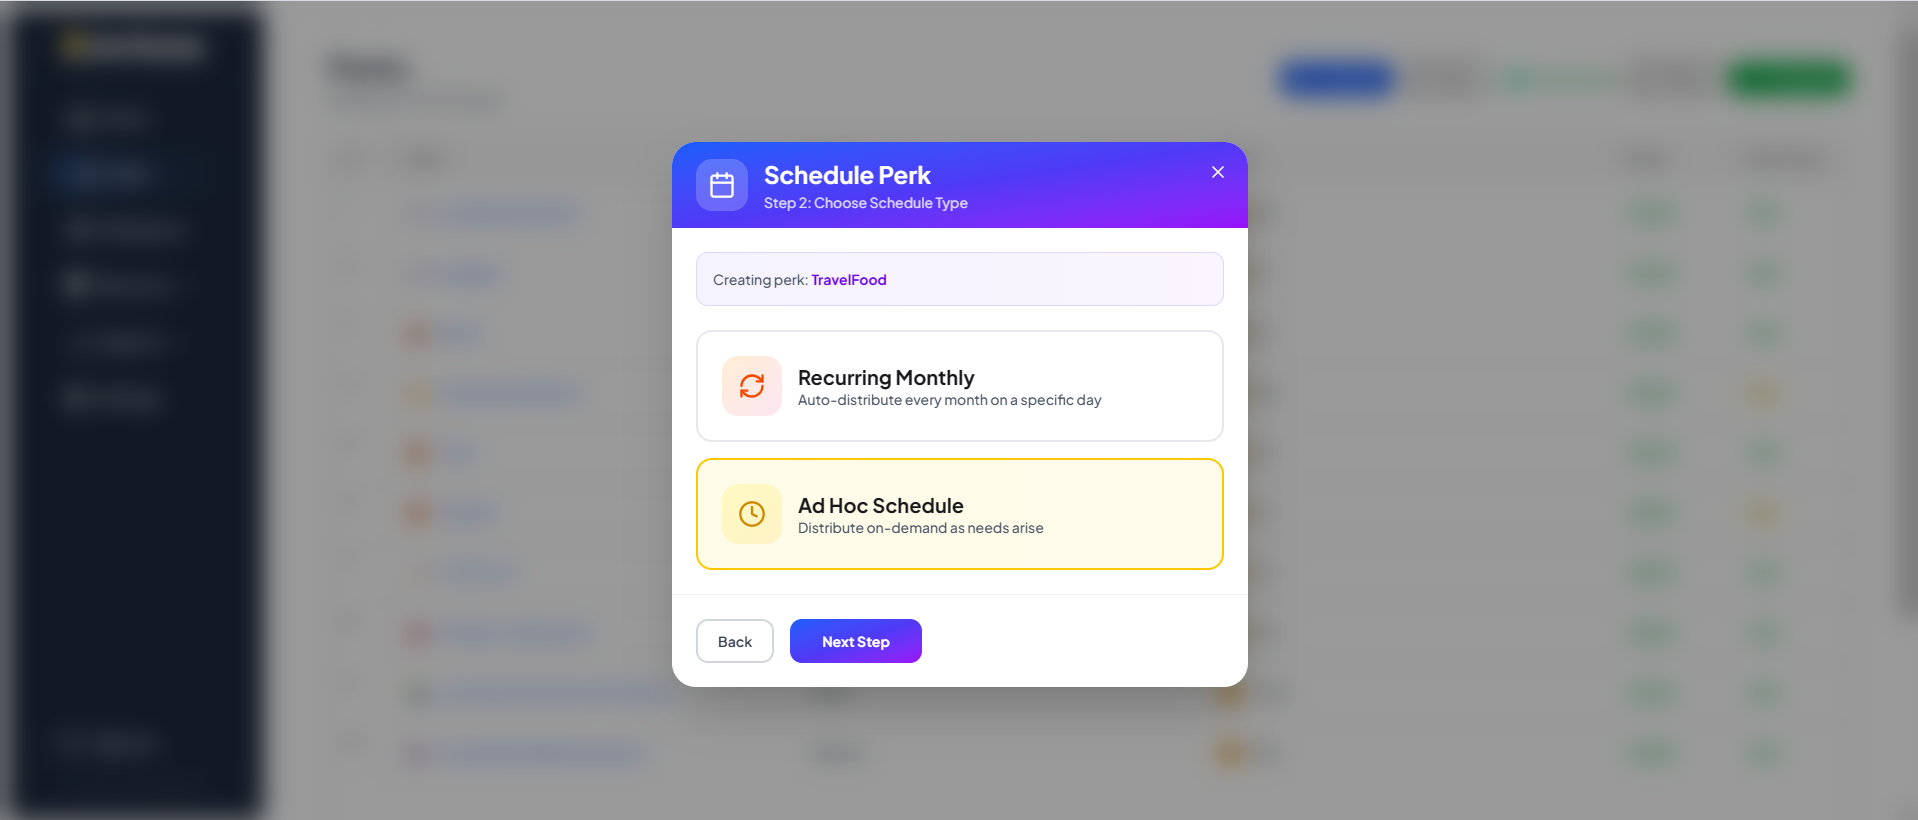
Choose one of the following schedule types:
- Recurring Monthly: Auto-distribute every month on a specific day.
- Ad Hoc Schedule: Distribute on-demand as needs arise.
Option 1: Recurring Monthly (Food, Medical, Fuel, or Custom)
Best for monthly or periodic benefits. If you choose Recurring Monthly, click Next Step to configure the recurrence schedule:
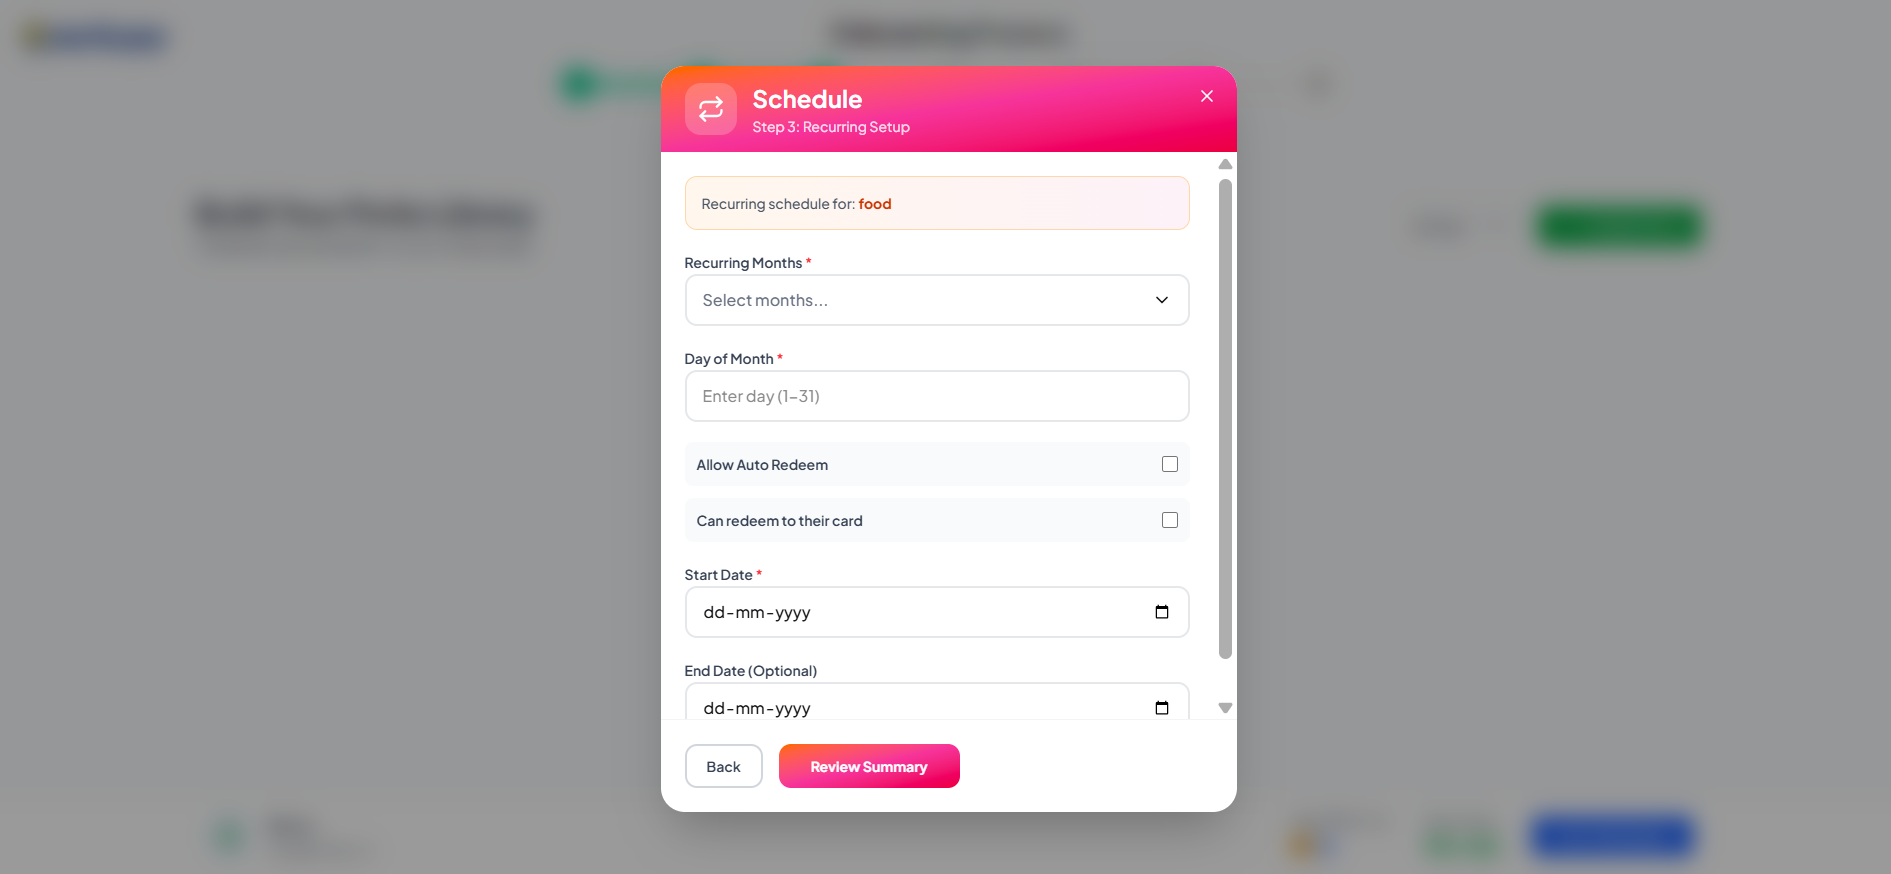
Configure:
| Setting | What it means |
|---|---|
| Recurring Months | Every month, or select specific months (e.g., Jan, April, July) |
| Day of Month | Which day (1–31) the perk is credited |
| Allow Auto Redeem | Automatically redeem to employee's card |
| Can Redeem to Card | Allow employees to transfer to their RuPay card |
Option 2: Ad Hoc Schedule (Food, Medical, Fuel, or Custom)
Best for on-demand distributions where benefits are loaded based on dynamic employee needs (e.g., travel expenses, off-cycle bonuses).
If you choose Ad Hoc Schedule, click Next Step to configure distribution settings:
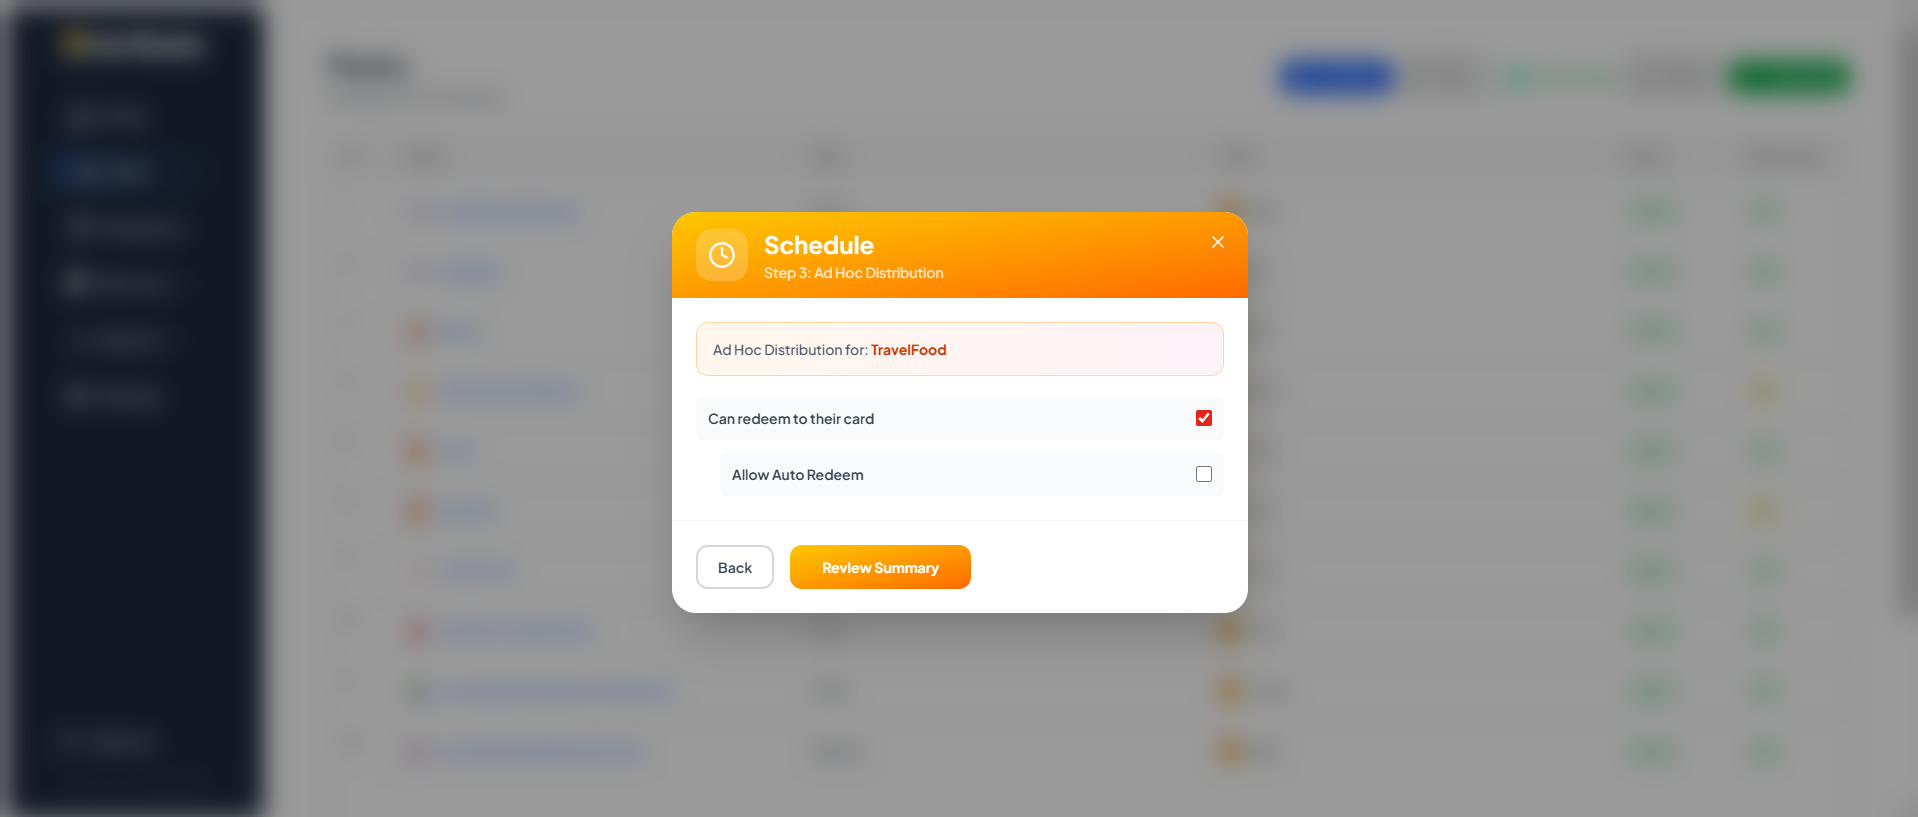
Configure:
| Setting | What it means |
|---|---|
| Can Redeem to Card | Allow employees to transfer the loaded coins to their RuPay card |
| Allow Auto Redeem | Automatically redeem to the employee's card |
Ad Hoc Perk Behavior
When you review and create an Ad Hoc perk, note the following dynamic behaviors on the summary screen:
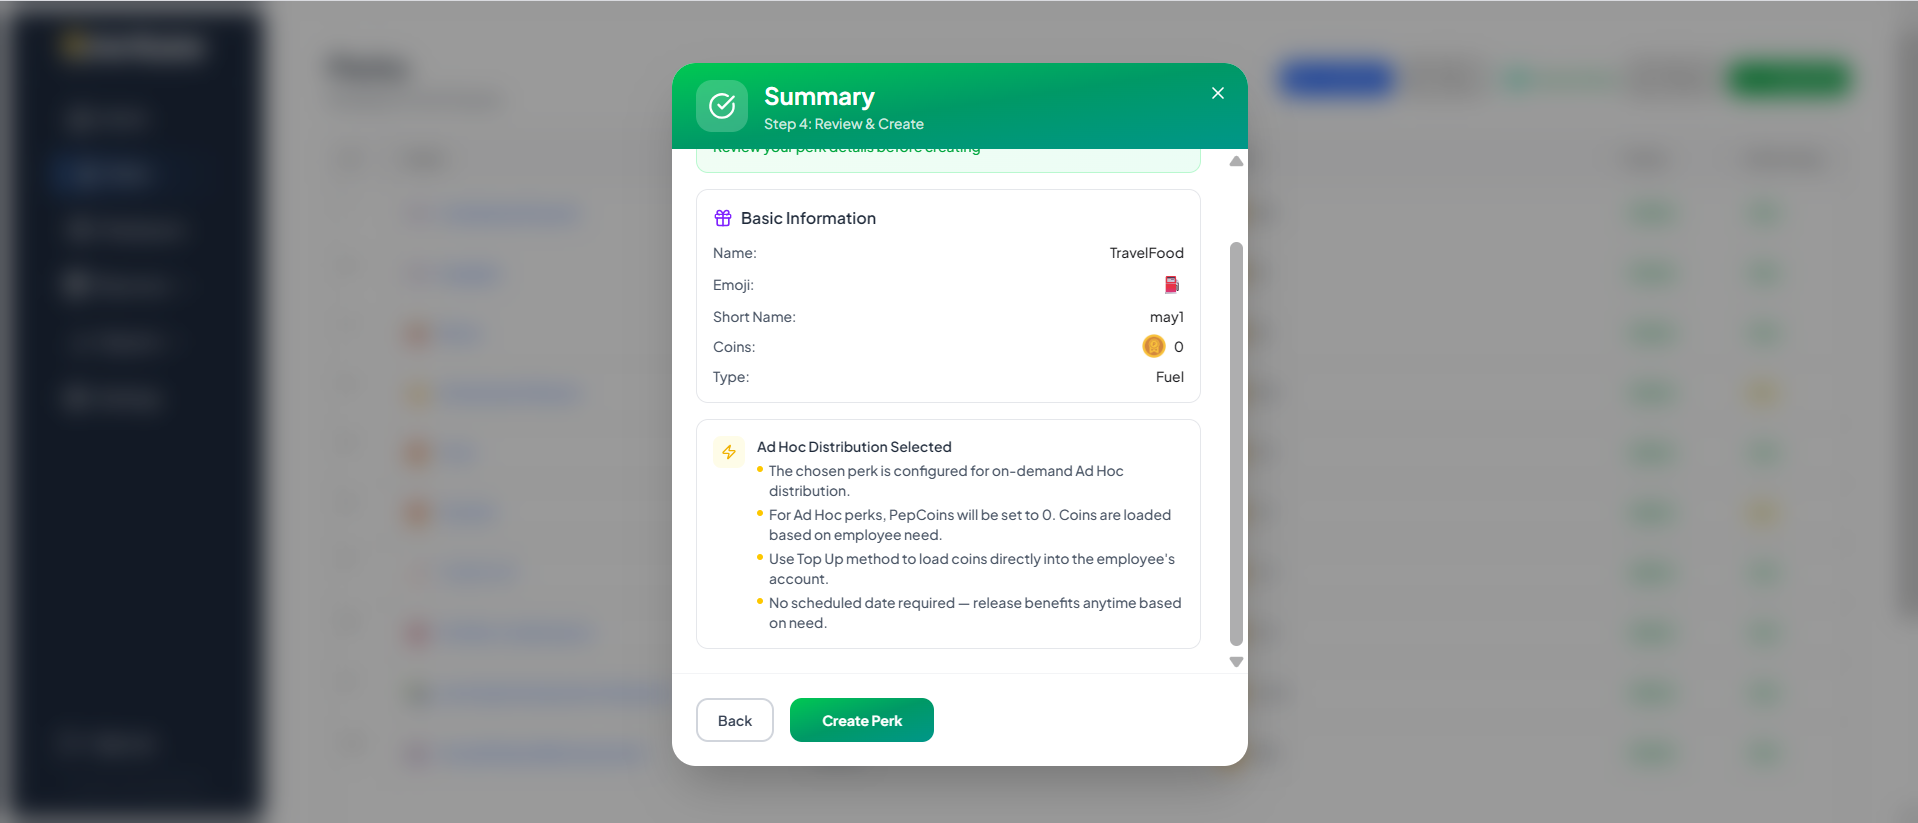
- Initial Coins Set to 0: Because coins are distributed on-demand, the initial perk coin value is configured as
0. - Top Up Loading Method: Coins are loaded directly into the employee's account as the need arises using the Top Up method.
- No Scheduled Date: No automatic run dates are scheduled; benefits are released manually on-demand.
Option 3: One-Time (Anniversary, Birthday)
Best for event-based perks.
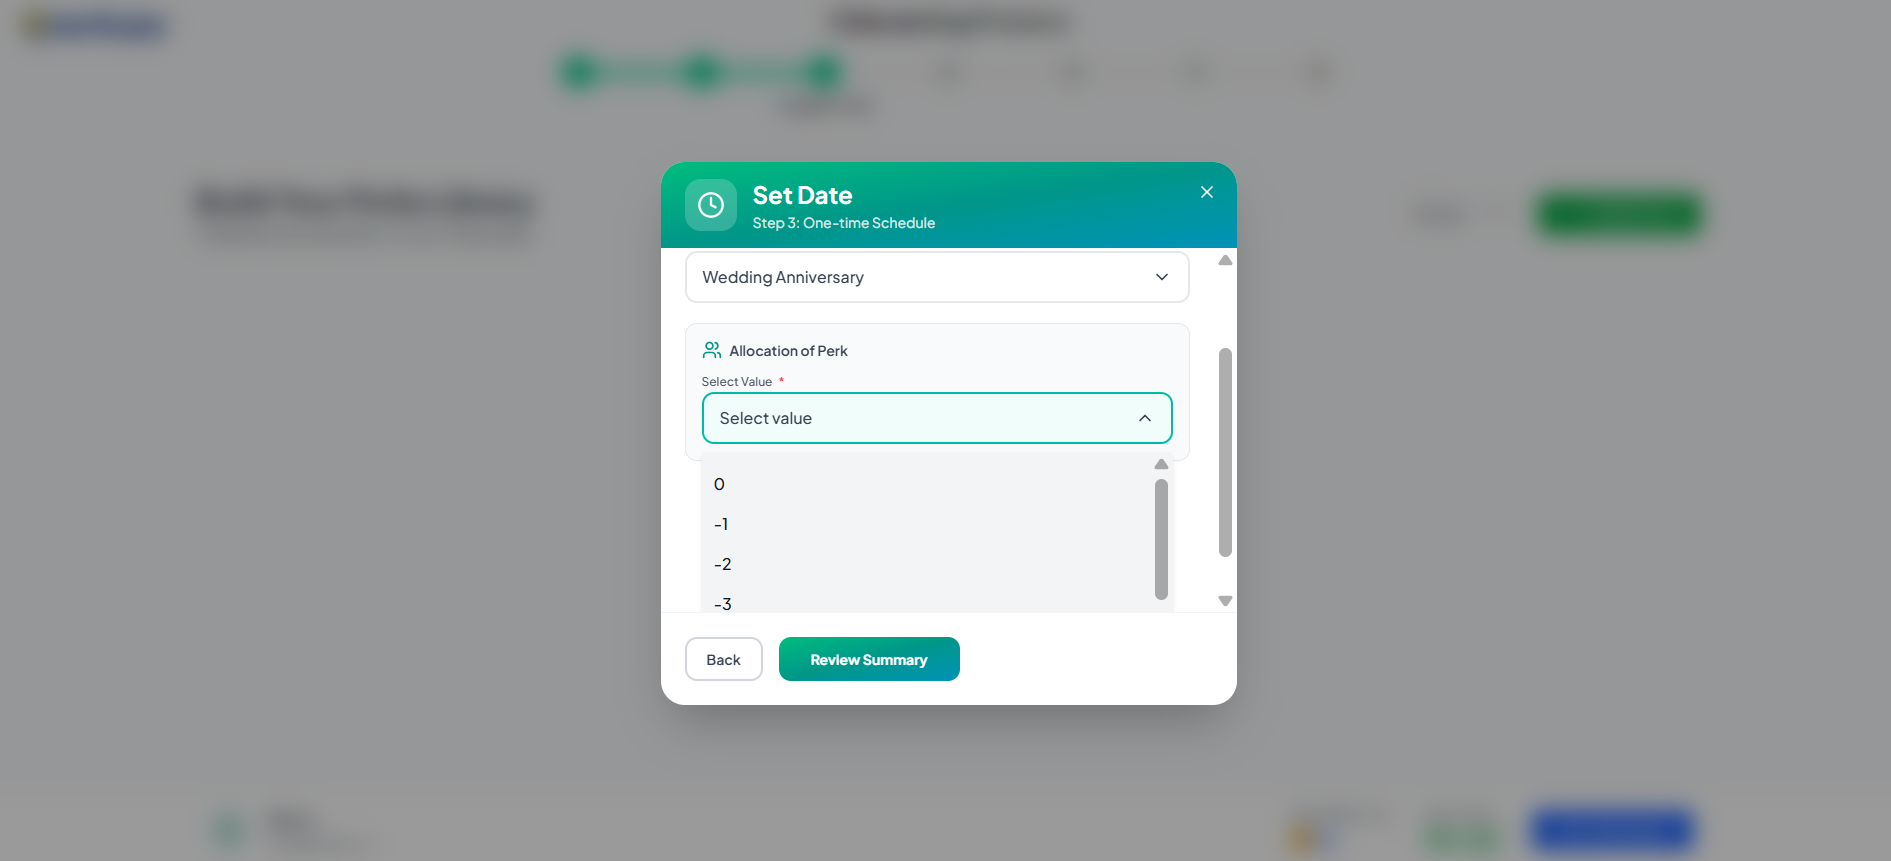
Pre-assignment days (-1 to -4):
Choose how many days before the event the perk should be assigned.
Example: If you select -3, the employee receives the perk 3 days before their anniversary.
Option 4: Rewards & Recognition
Best for performance rewards, spot bonuses, or recognition programs.
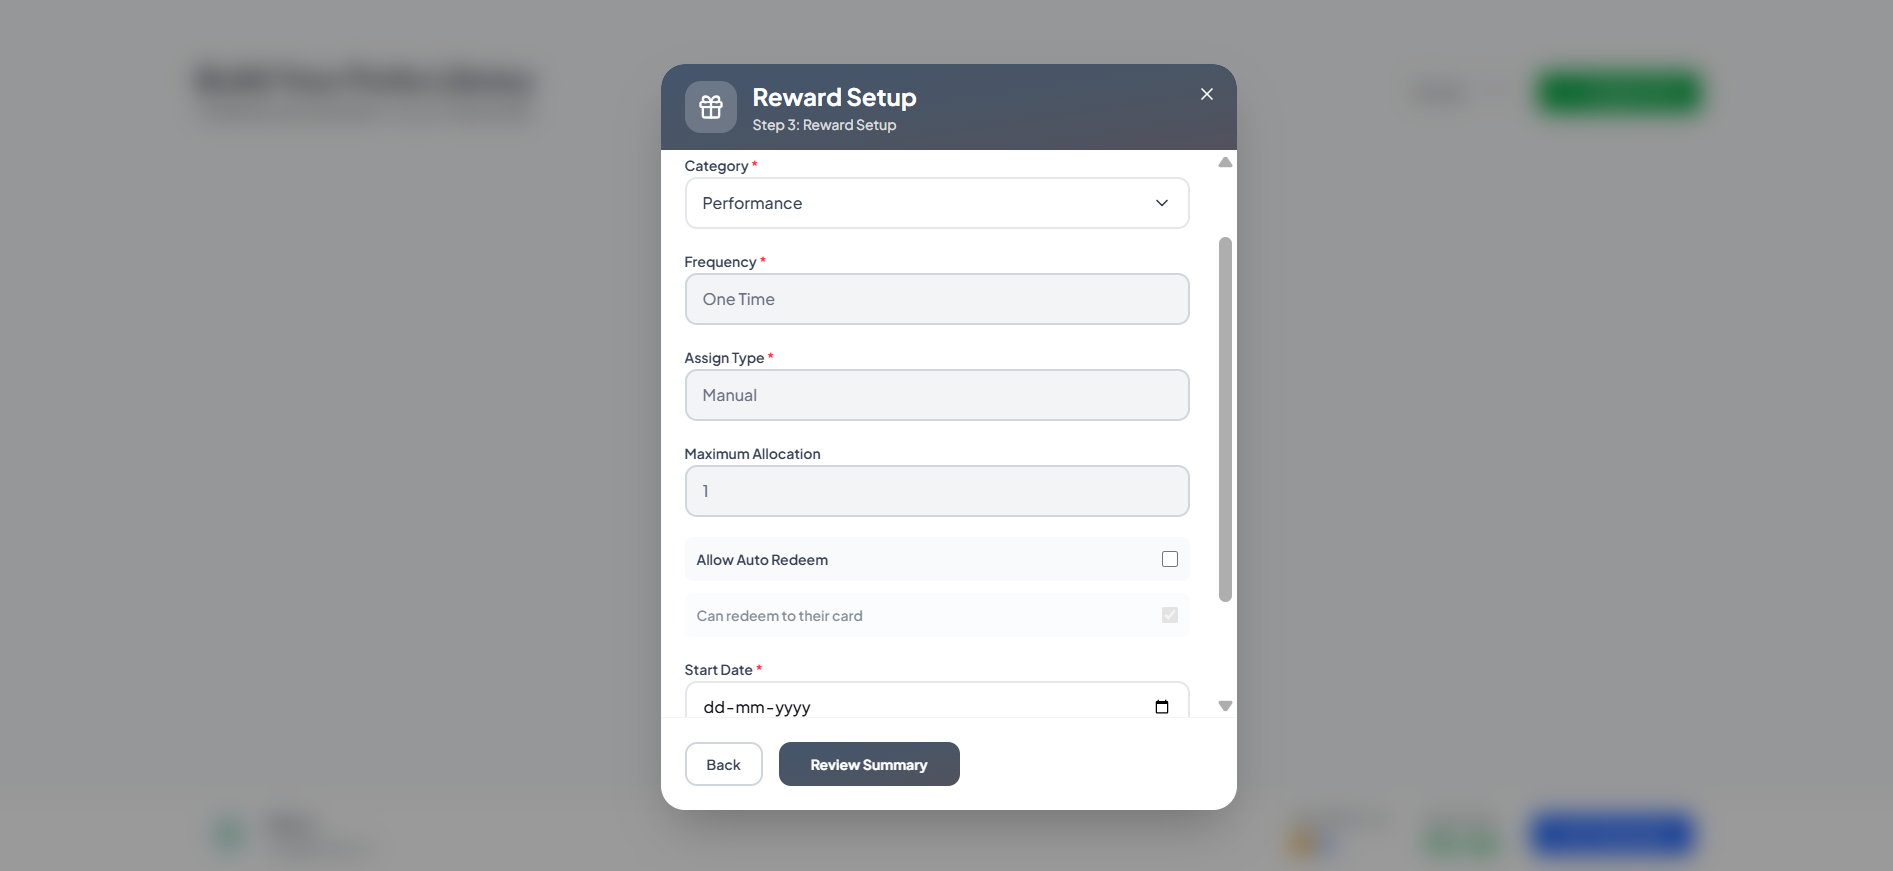
Configure:
| Setting | What it means |
|---|---|
| Category | Type of reward |
| Frequency | One-time (default) |
| Assign Type | Manual (you decide who gets it) |
| Maximum Allocation | Limit on how many times this can be given |
| Start Date | When the reward program starts |
The End Date is automatically set to the next day.
Option 5: Others (Custom)
For any other perk type.
Choose between:
- Recurring — repeats on a schedule
- One-time — assigned once
Choosing from Marketplace (Optional)
When setting up the schedule (applicable to Recurring, One-Time, and Others), you can configure the perk so that employees select their own benefits from a pre-defined marketplace of gift cards and vouchers.
To enable this:
- In the schedule settings screen, check the Choose from market place checkbox.
- Select your marketplace type:
- Category: Restrict selections to specific categories of gift cards.
- Brand: Restrict selections to specific gift card brands.
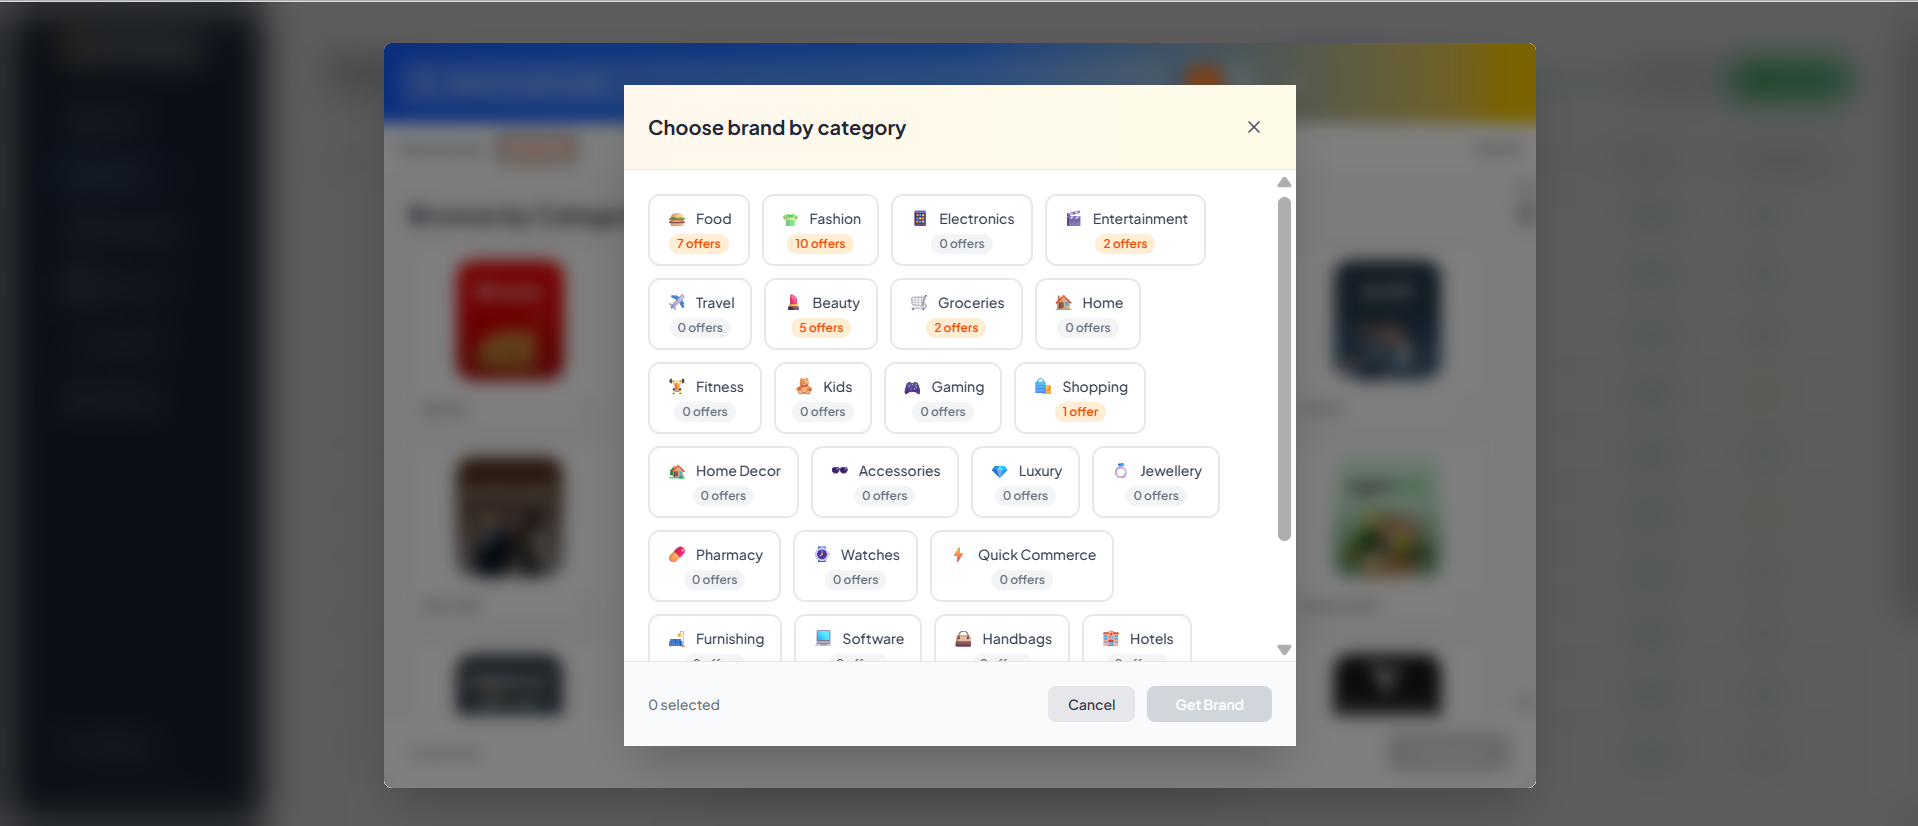
Option A: Category-Based Marketplace
If you choose Category, a modal will appear listing all available categories (e.g., Food, Fashion, Electronics, Entertainment) along with the count of active offers. You can select one or more categories for the perk.
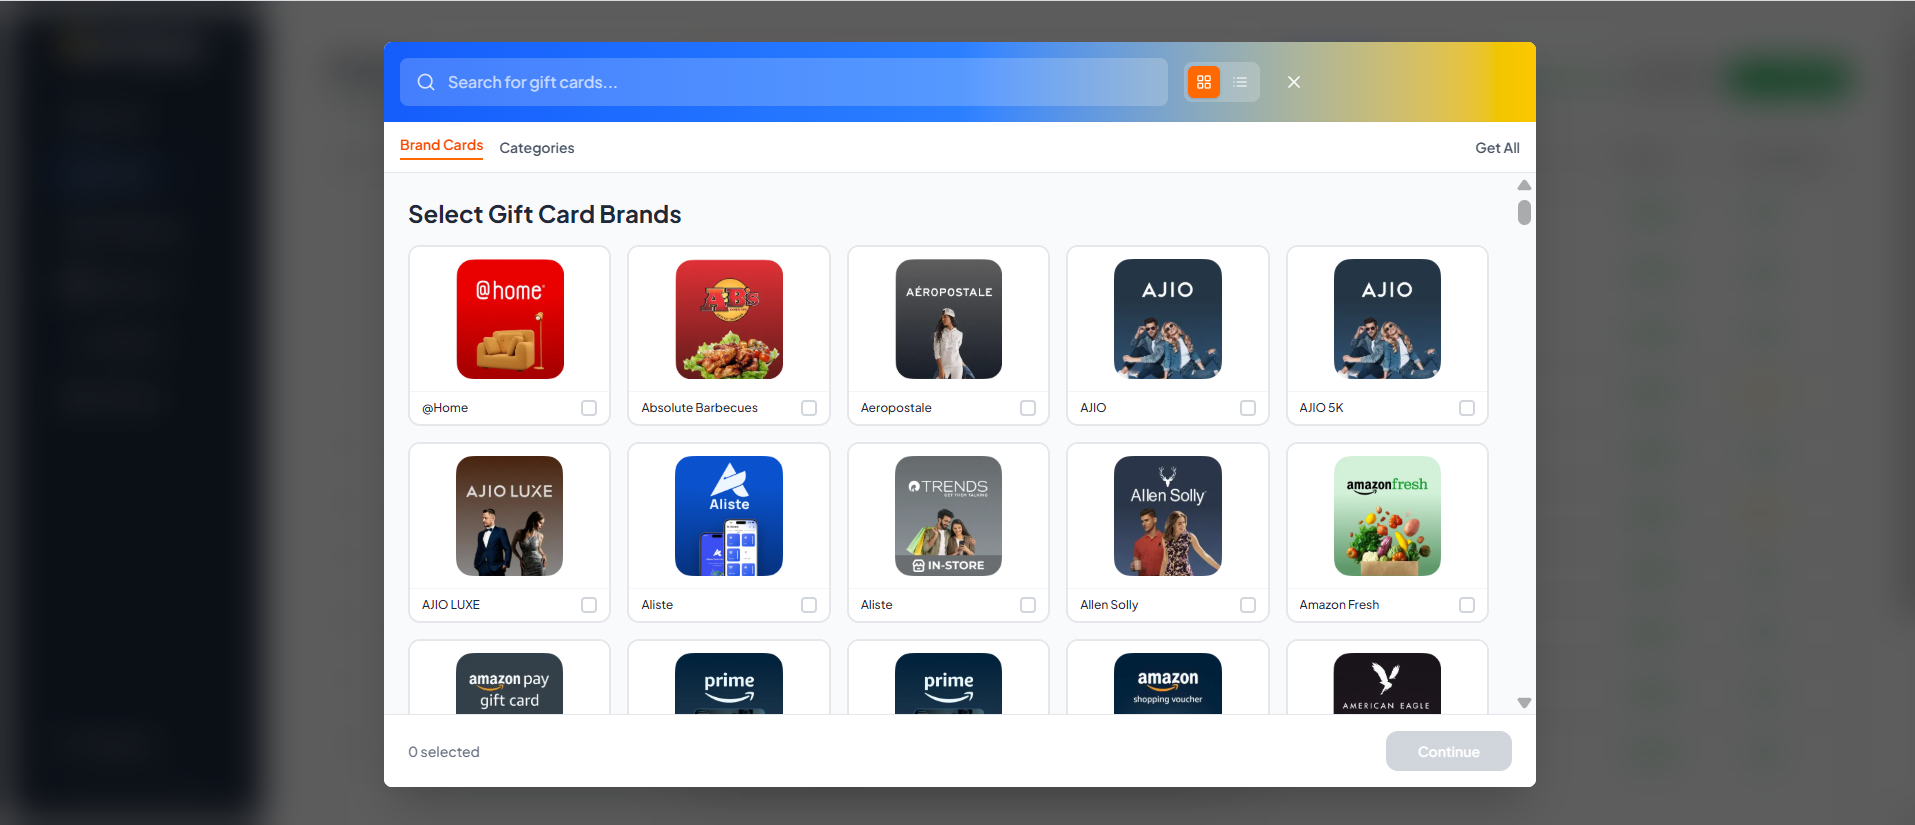
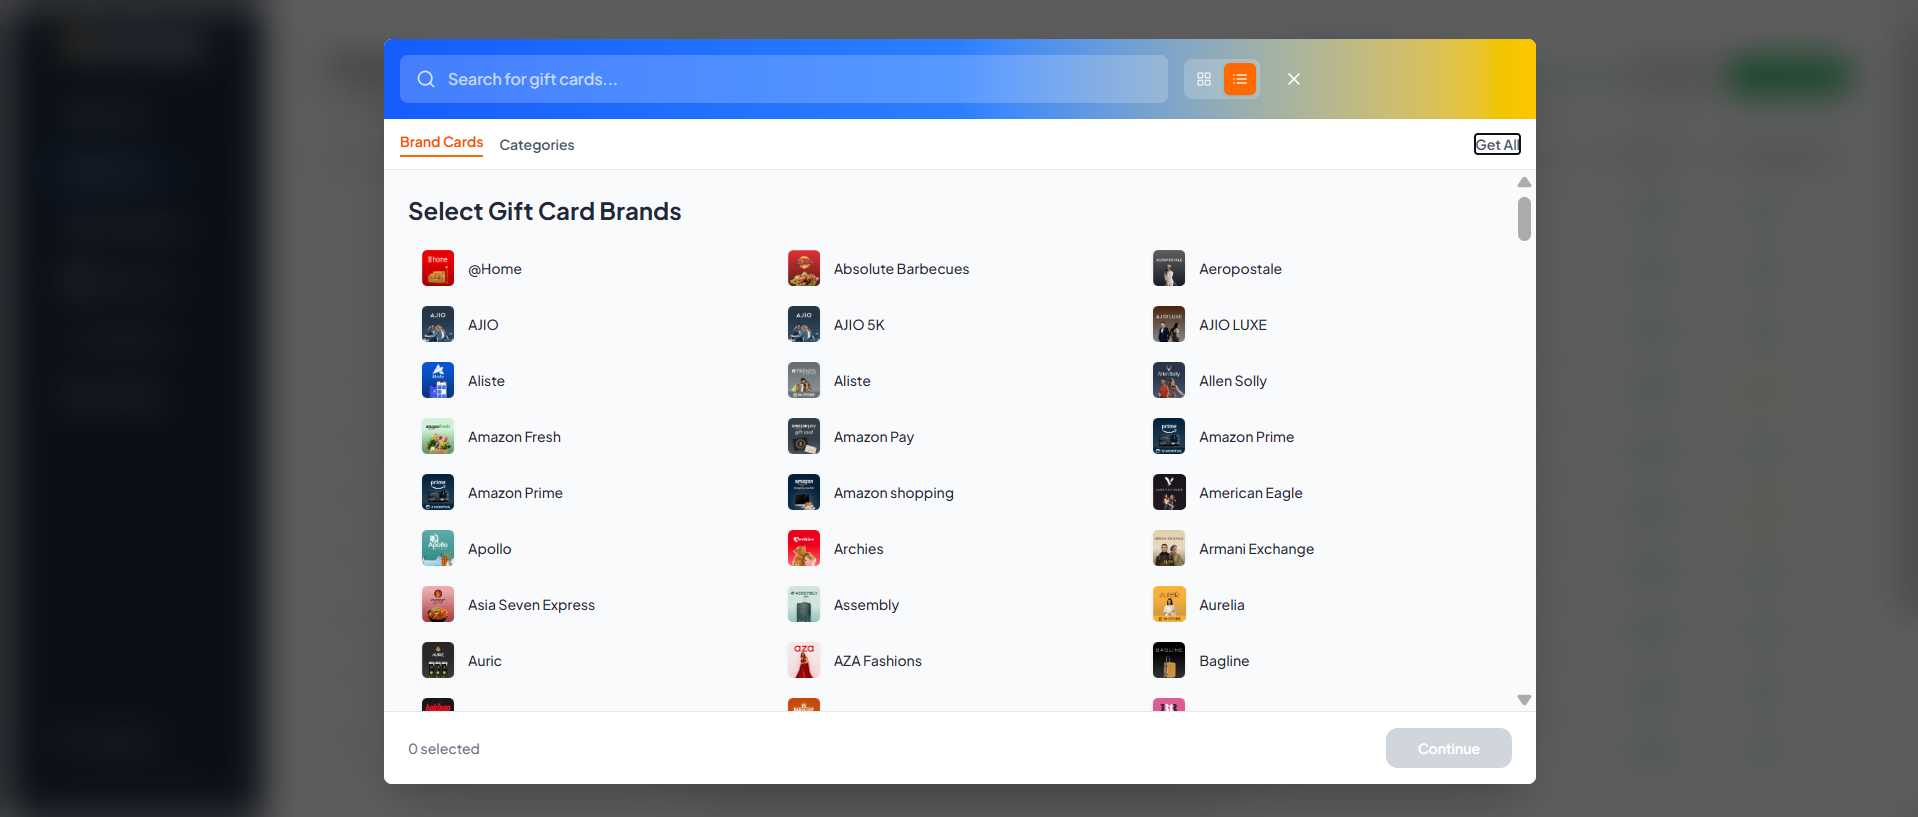
Option B: Brand-Based Marketplace
If you choose Brand, you can select specific brands that employees can redeem their PEP coins for. You can view and manage these brands in two formats:
- Grid View: Displays brand cards with logos, names, and checkboxes.
- List View: Displays a search-friendly vertical list of brands.
Use the layout toggle icons (squares/list layout) in the top-right corner of the selector dialog to switch views.
Step 5: Review & Create
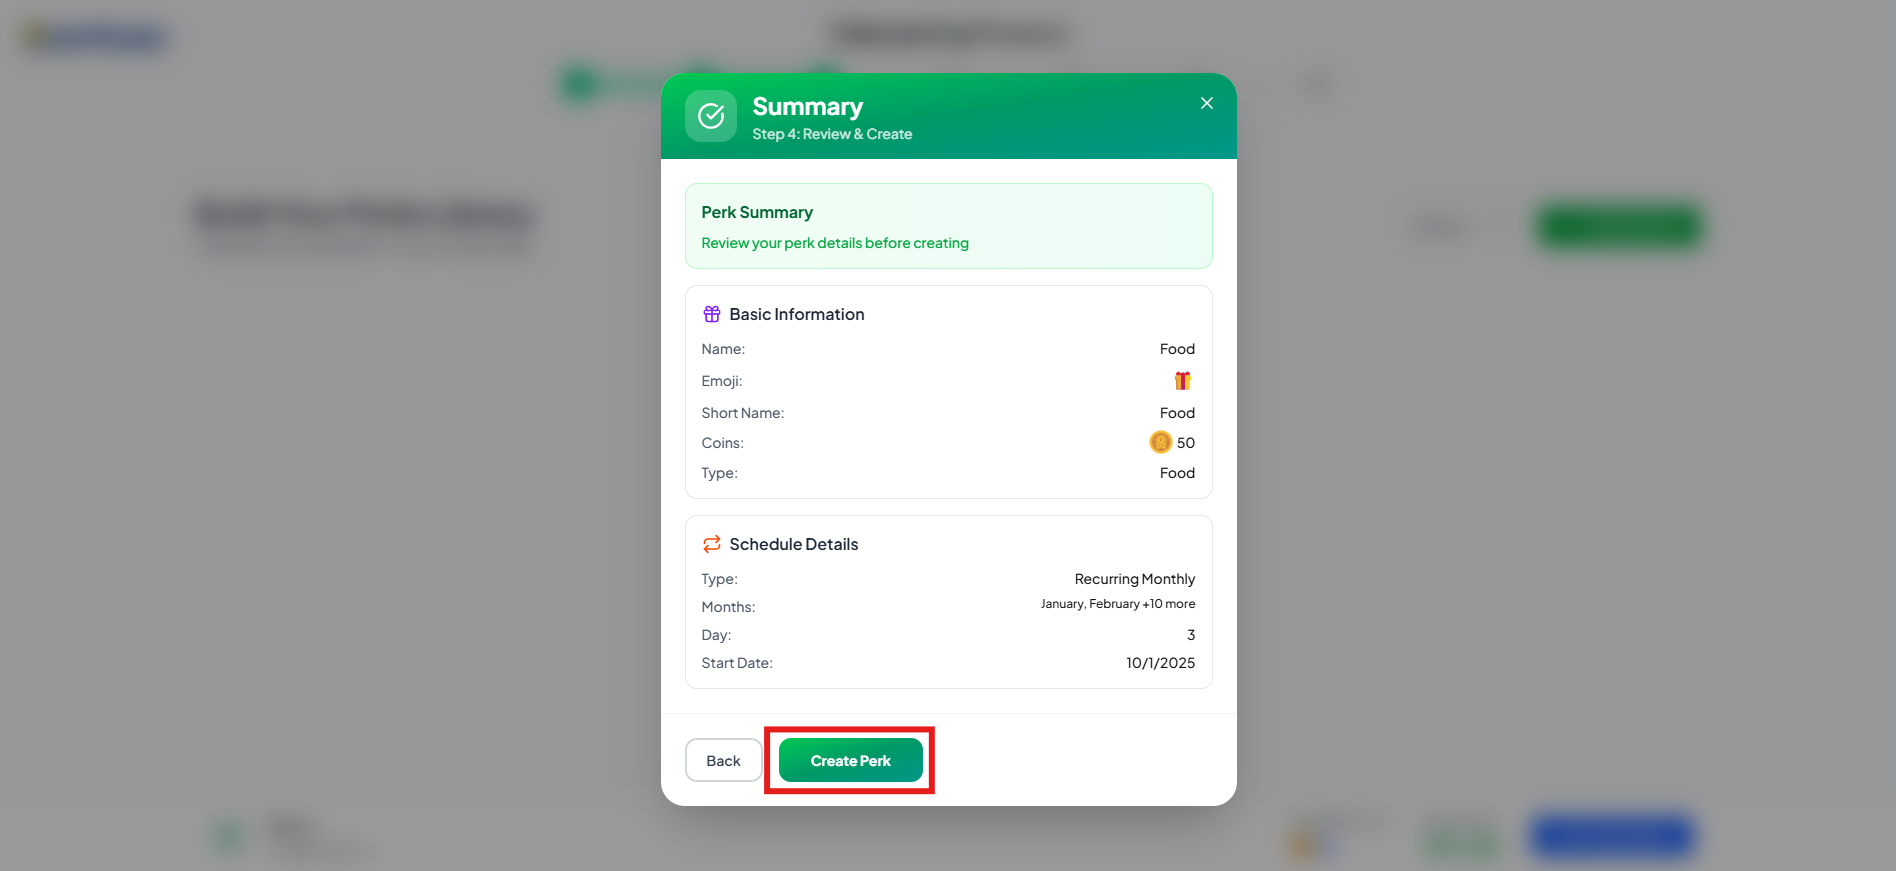
Review all the details:
- Basic Information (Name, Coins, Type)
- Schedule Details (When and how it's assigned)
Click Create Perk to finish.
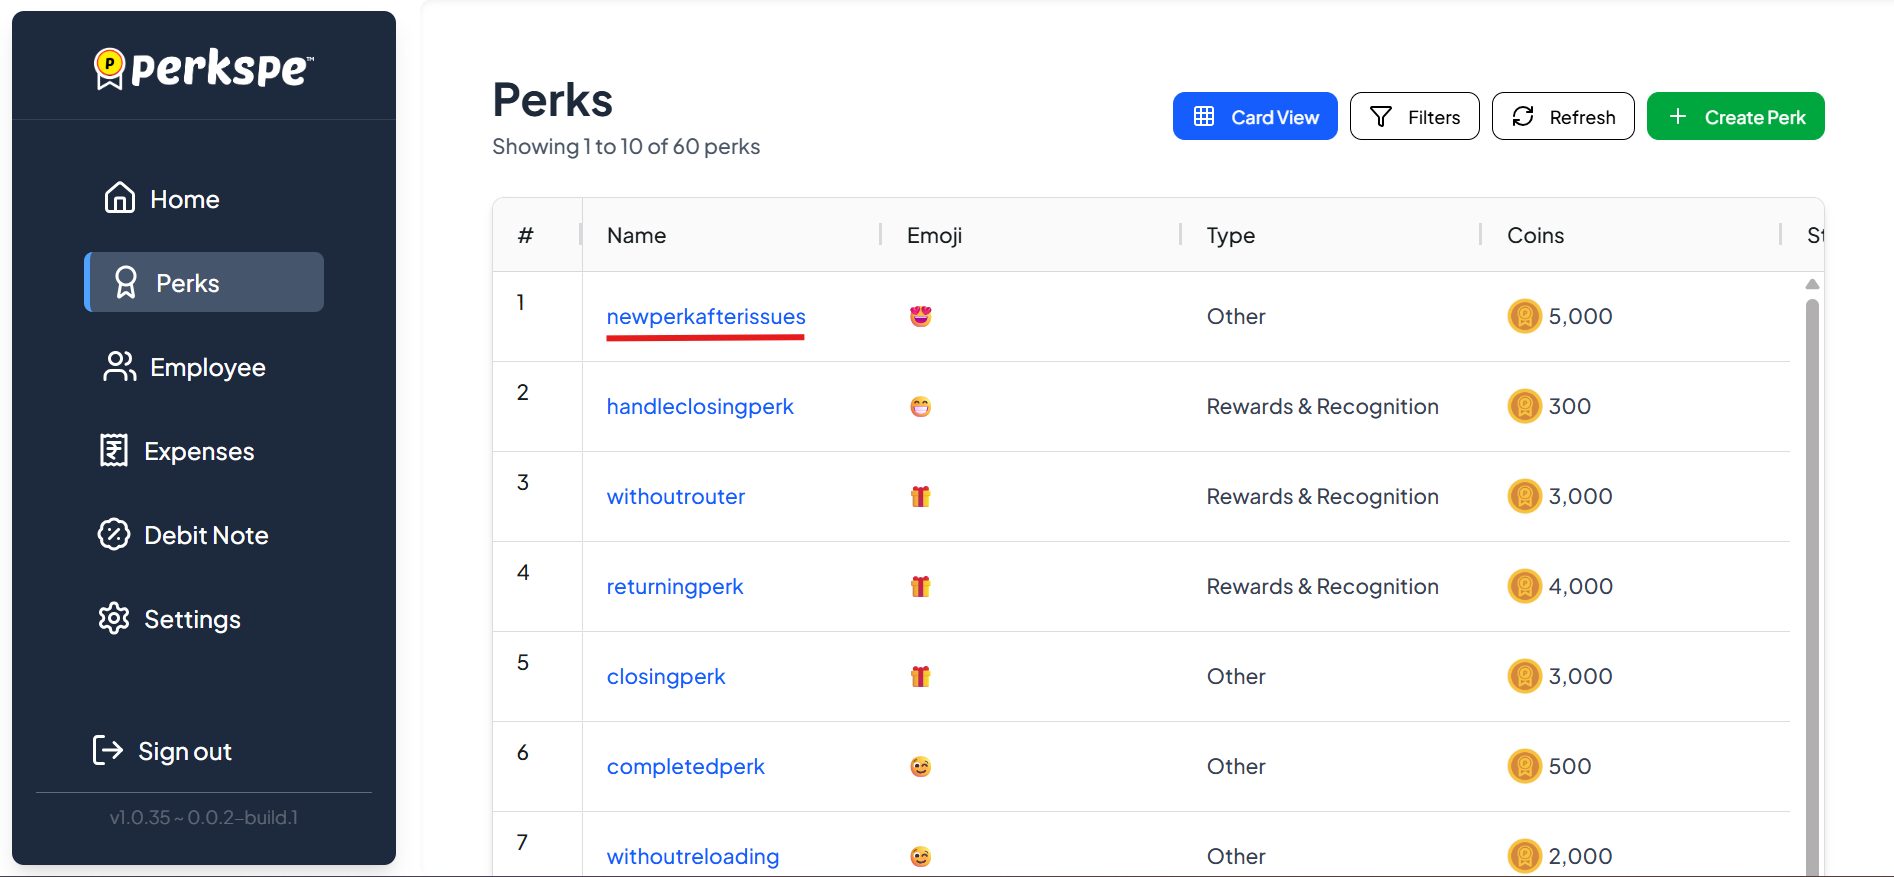
Your new perk will appear in the Perks list.
How to Assign Perks to Employees
After creating a perk, you need to assign it to employees. There are two ways:
Method 1: From the Perk
-
Go to Perks in the sidebar
-
Click on the perk name
-
Click the Assigned Employees tab
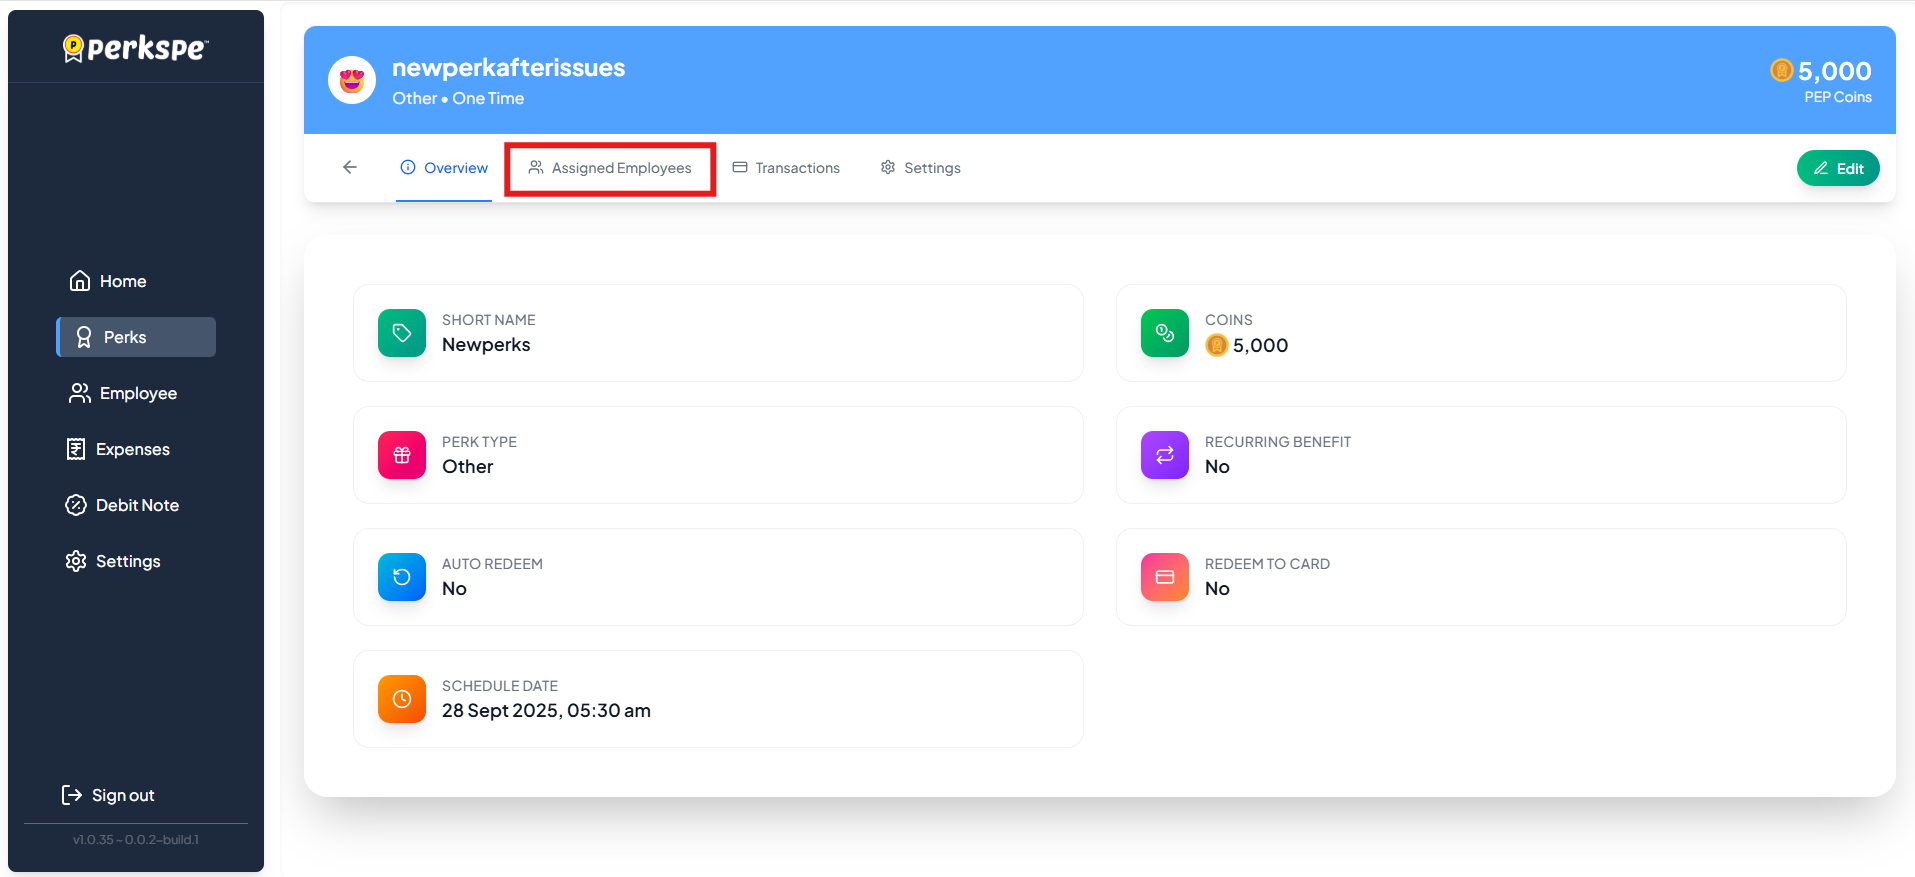
-
Click Assign Employees button
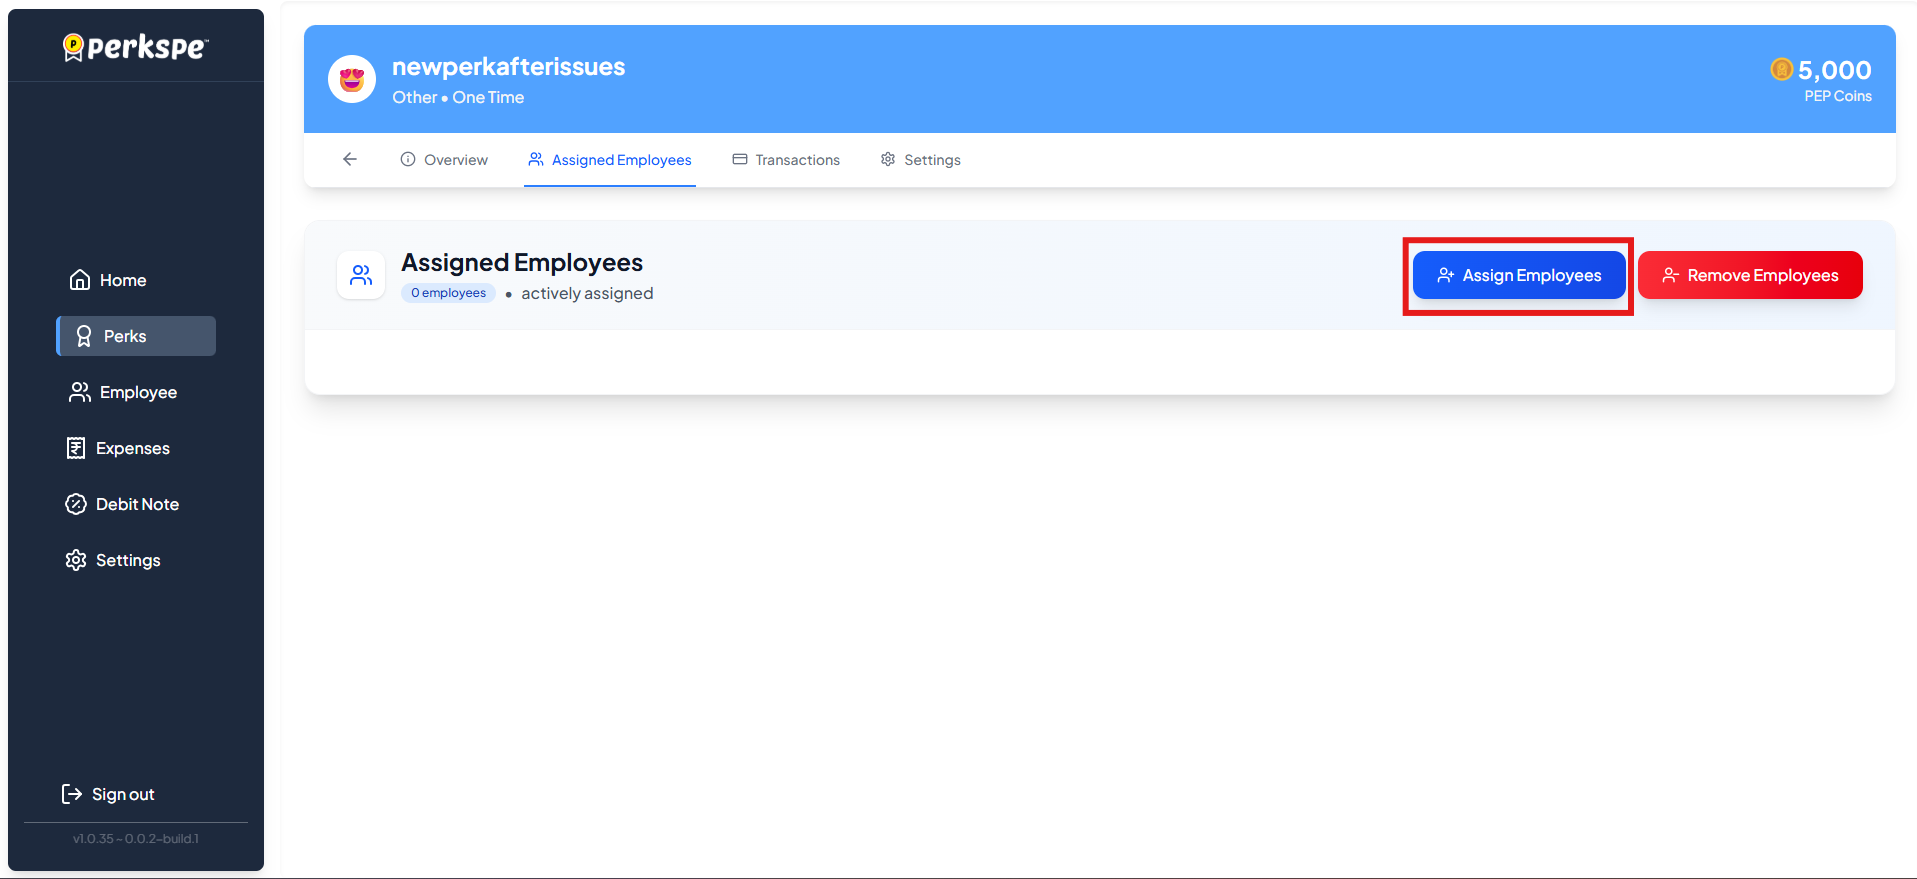
-
In the popup, select employees:
- Use the search bar to find specific people
- Check individual employees
- Or use Select All
-
Click Assign & Allocate
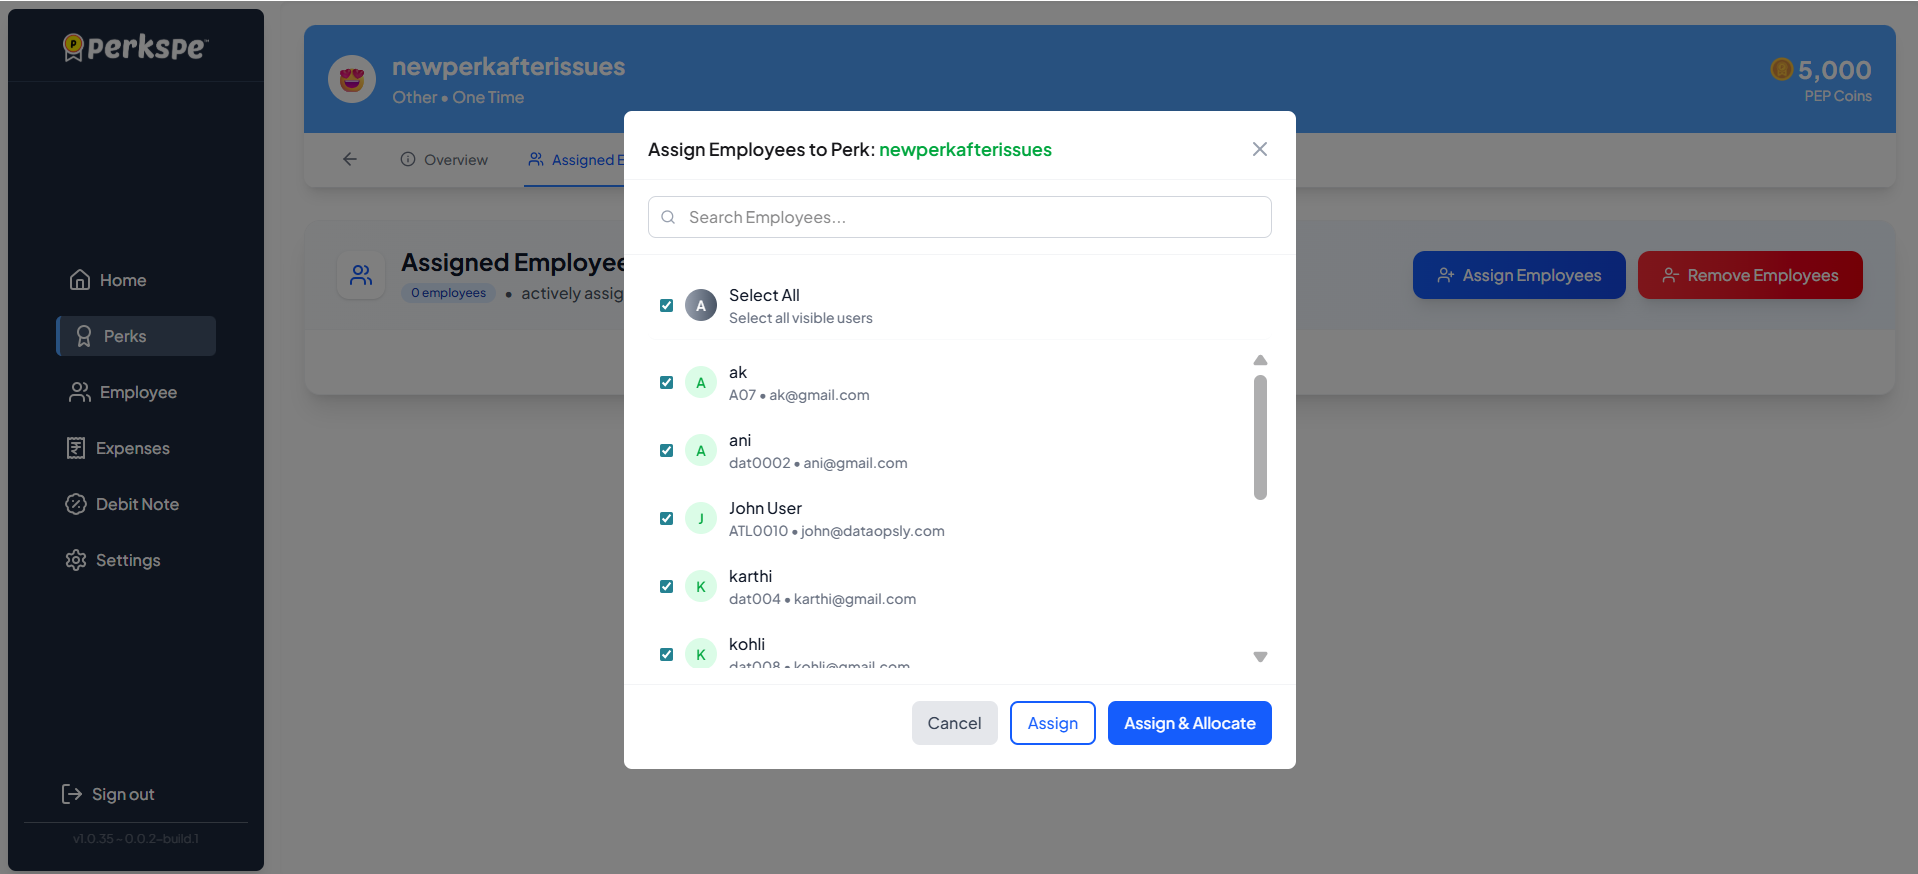
The count of assigned employees will update.
Method 2: From the Employee
-
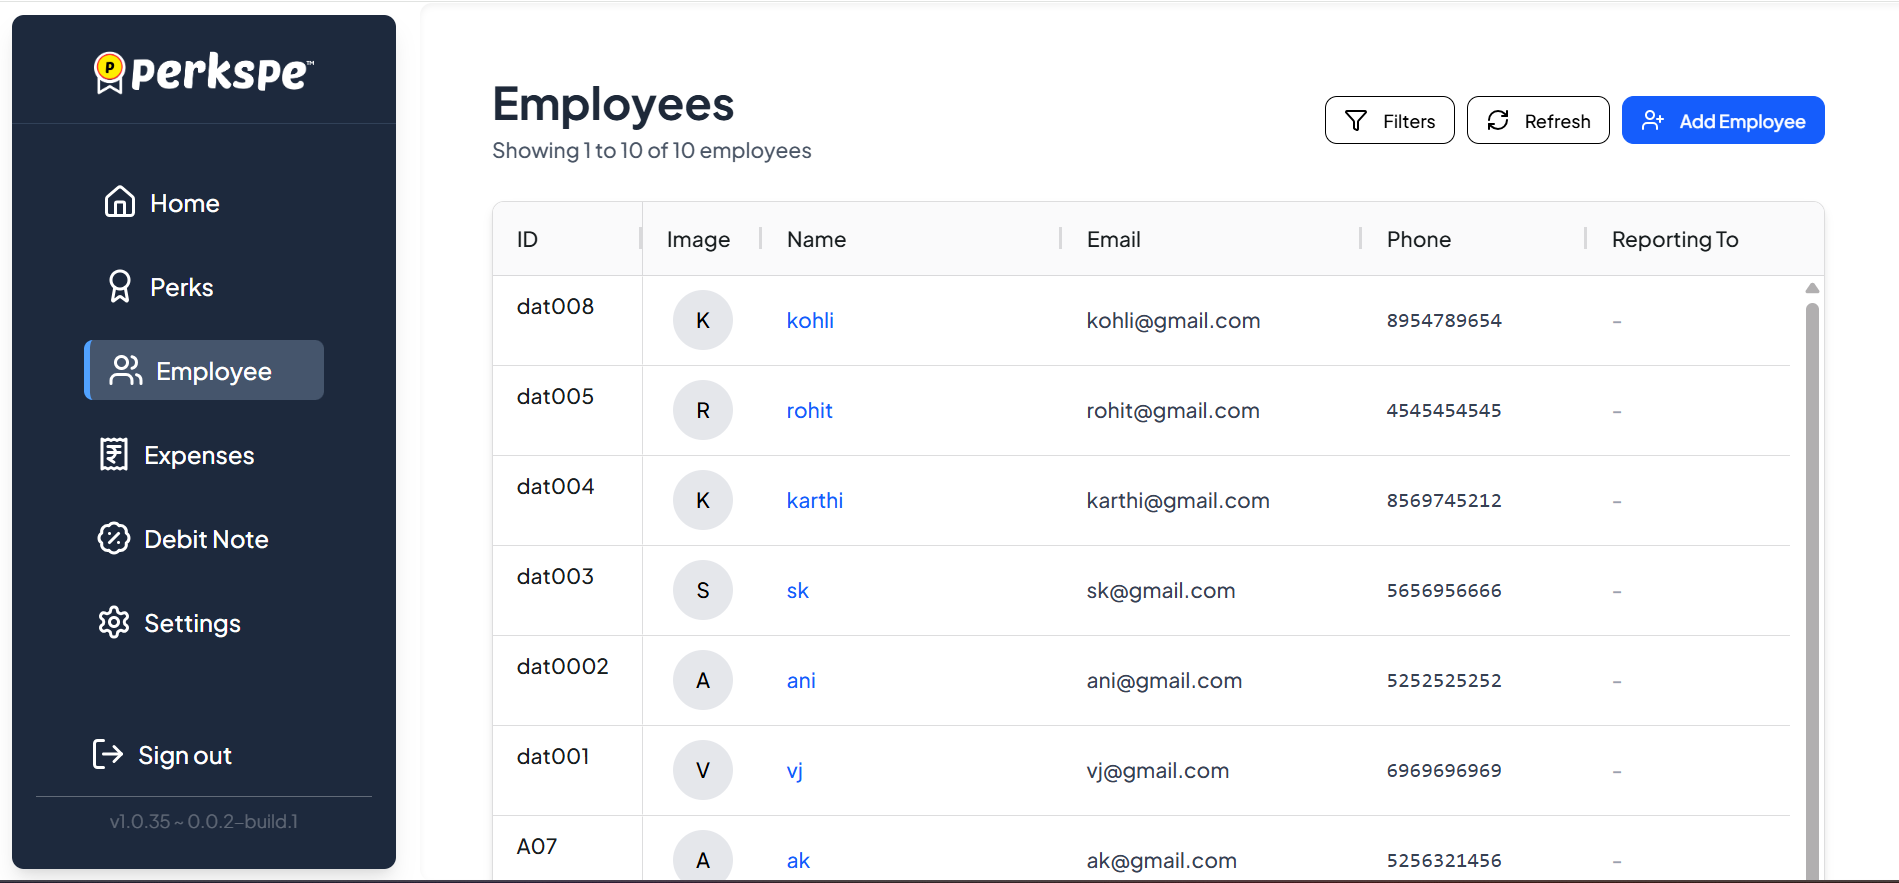
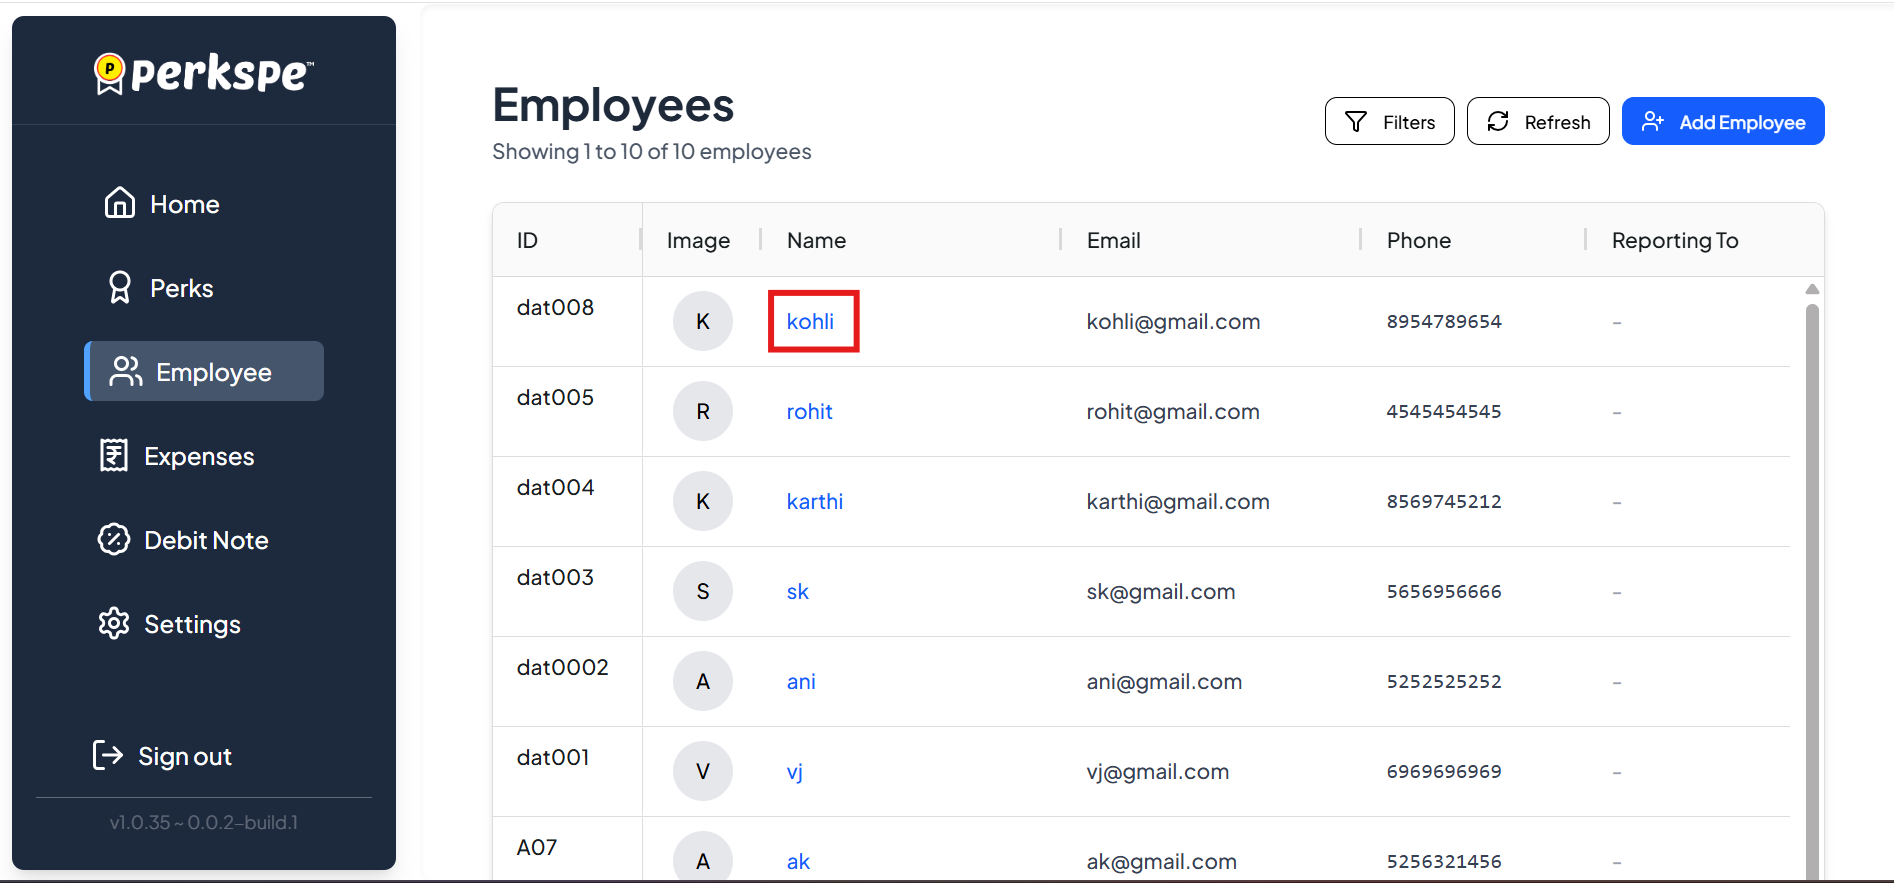
Click Employees in the sidebar
-
Select an employee
-
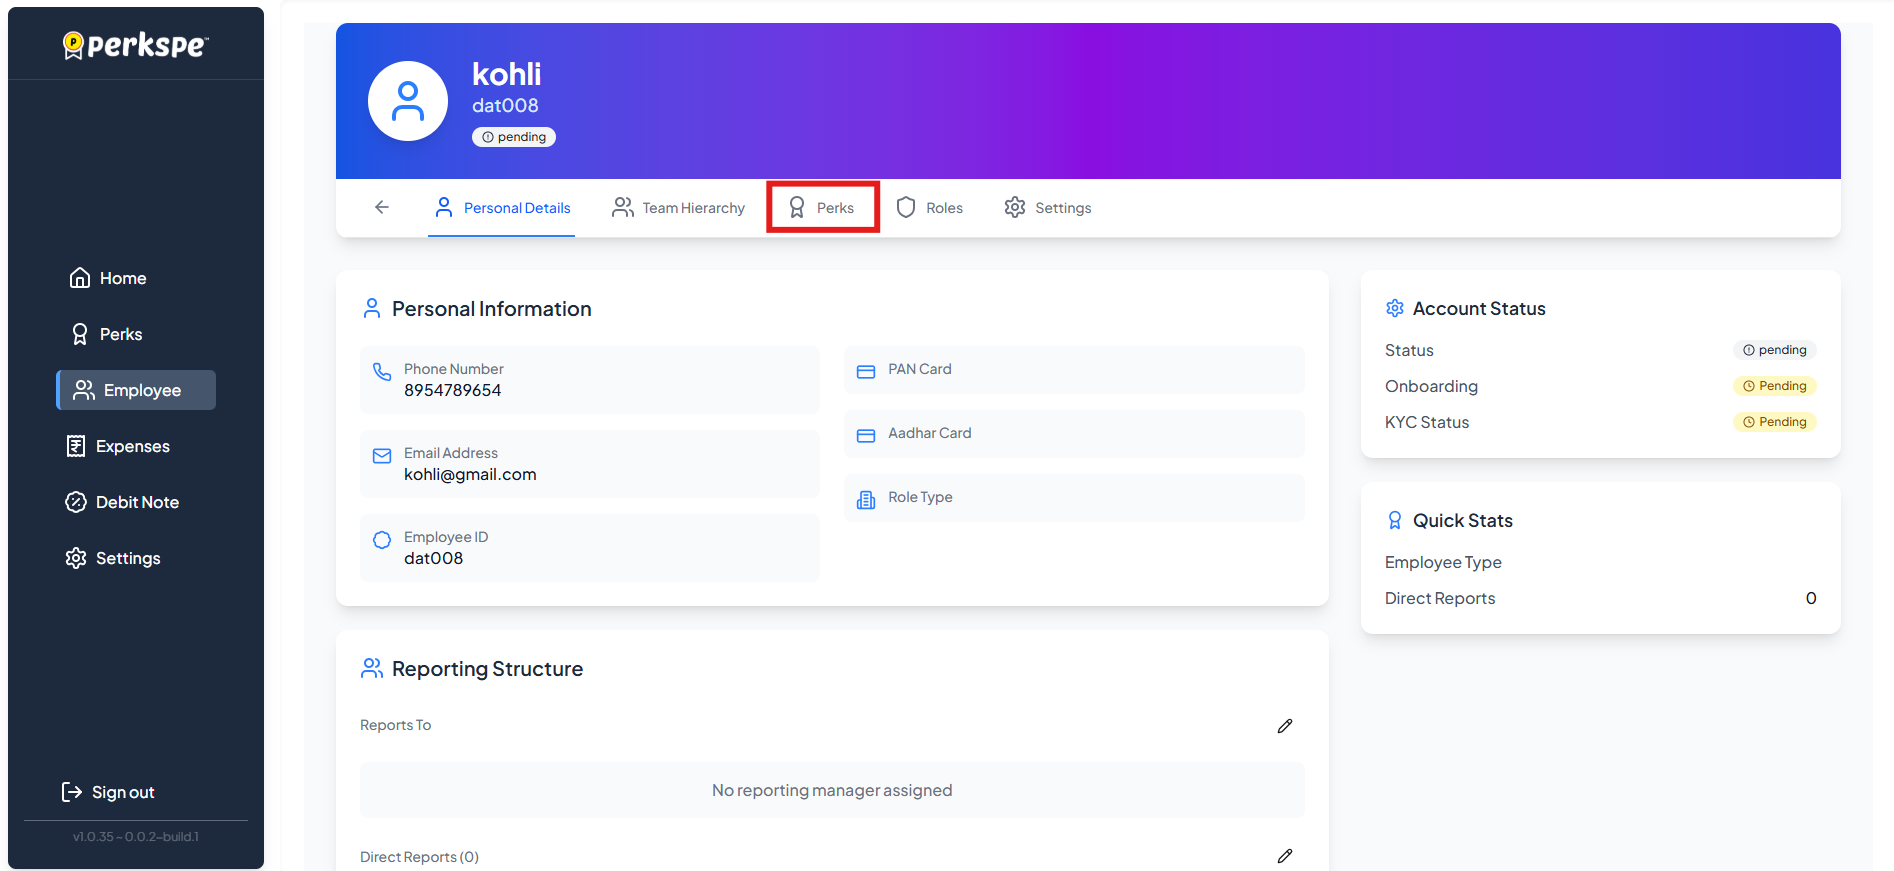
Click the Perks tab at the top
-
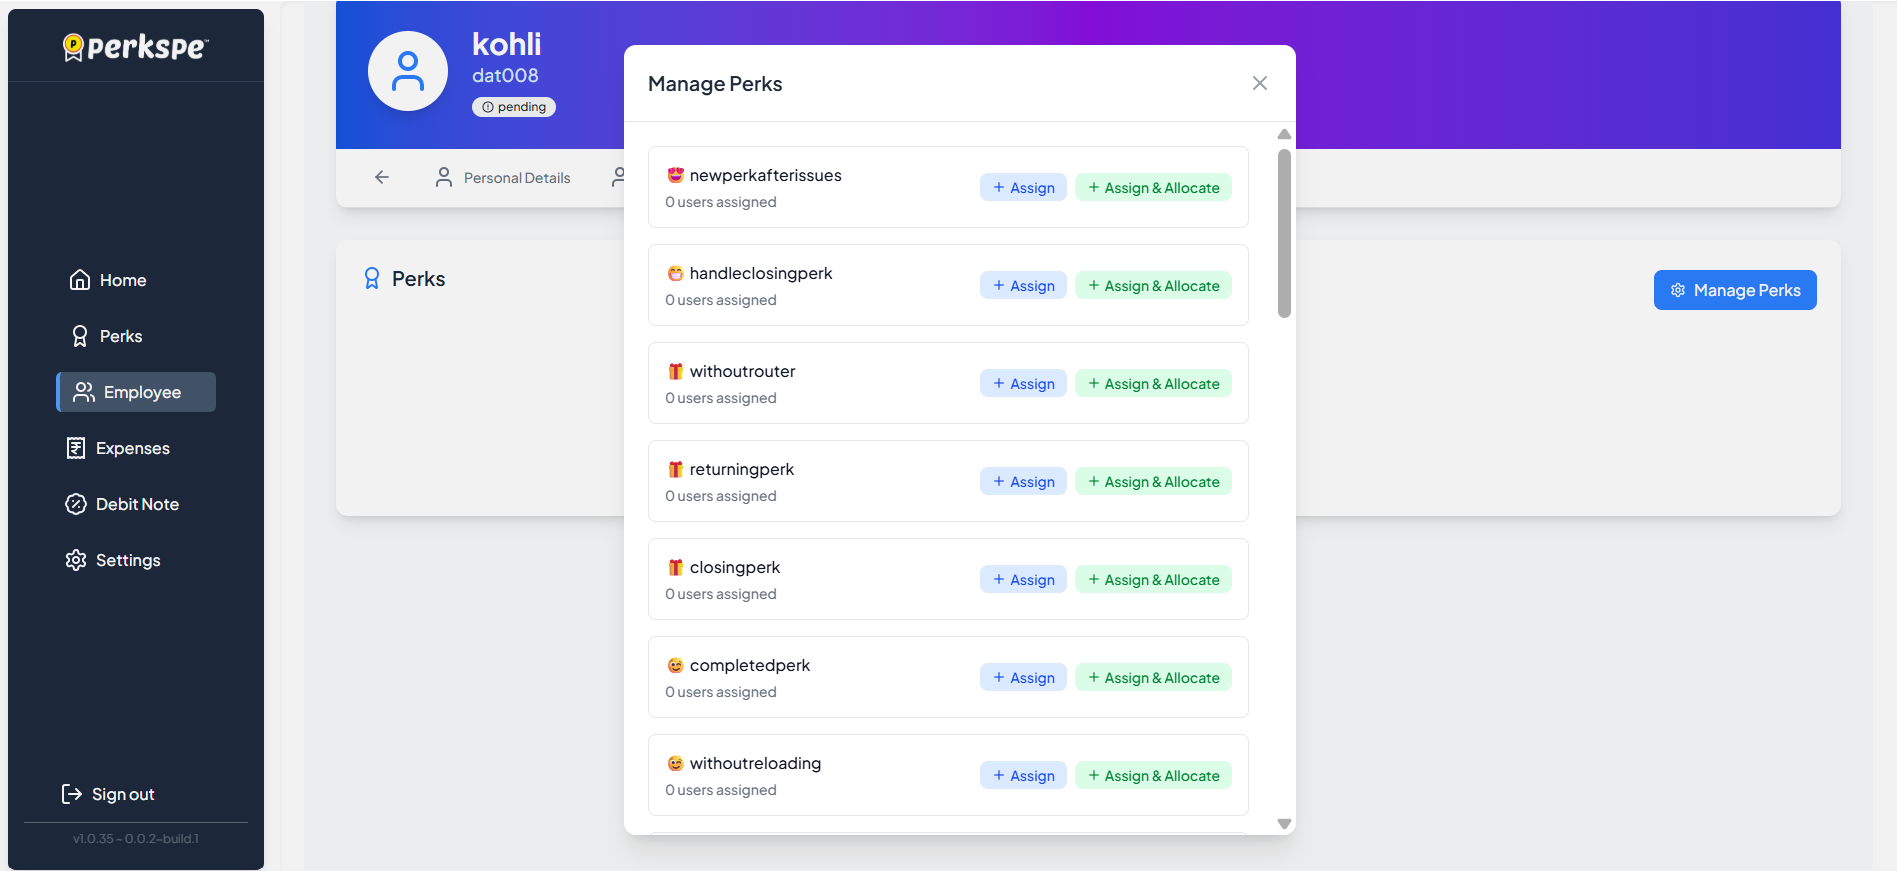
Click Manage Perks
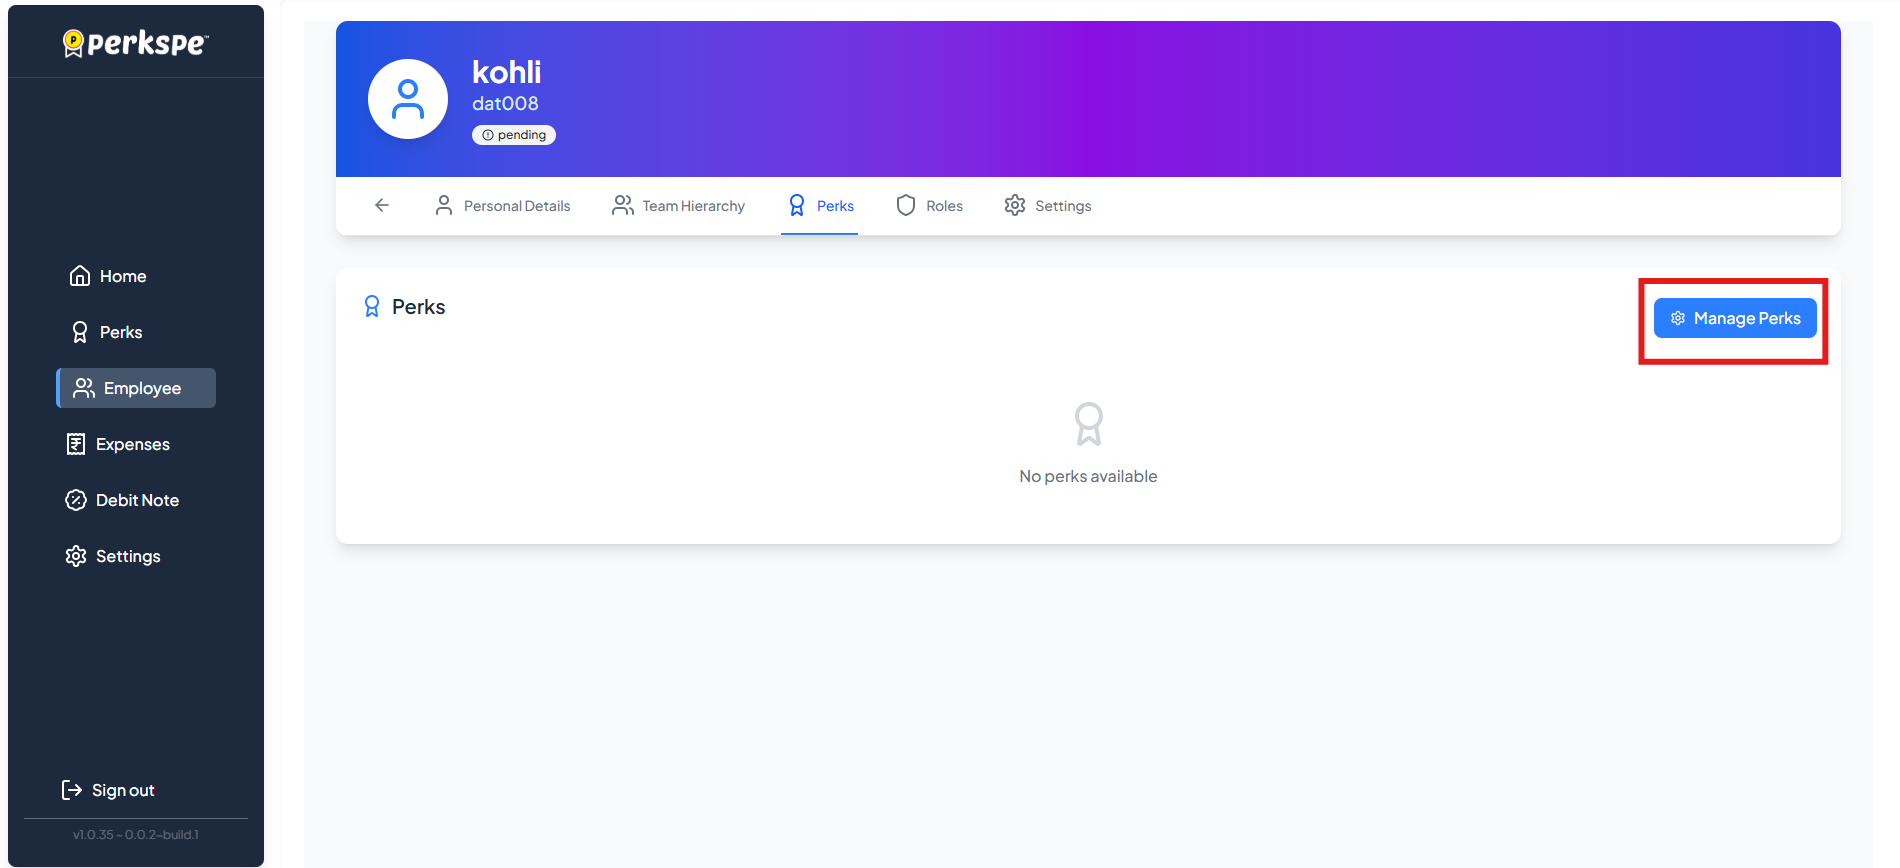
-
A popup shows all perks assigned to this employee
How to Remove Employees from a Perk
-
Go to the perk's Assigned Employees tab
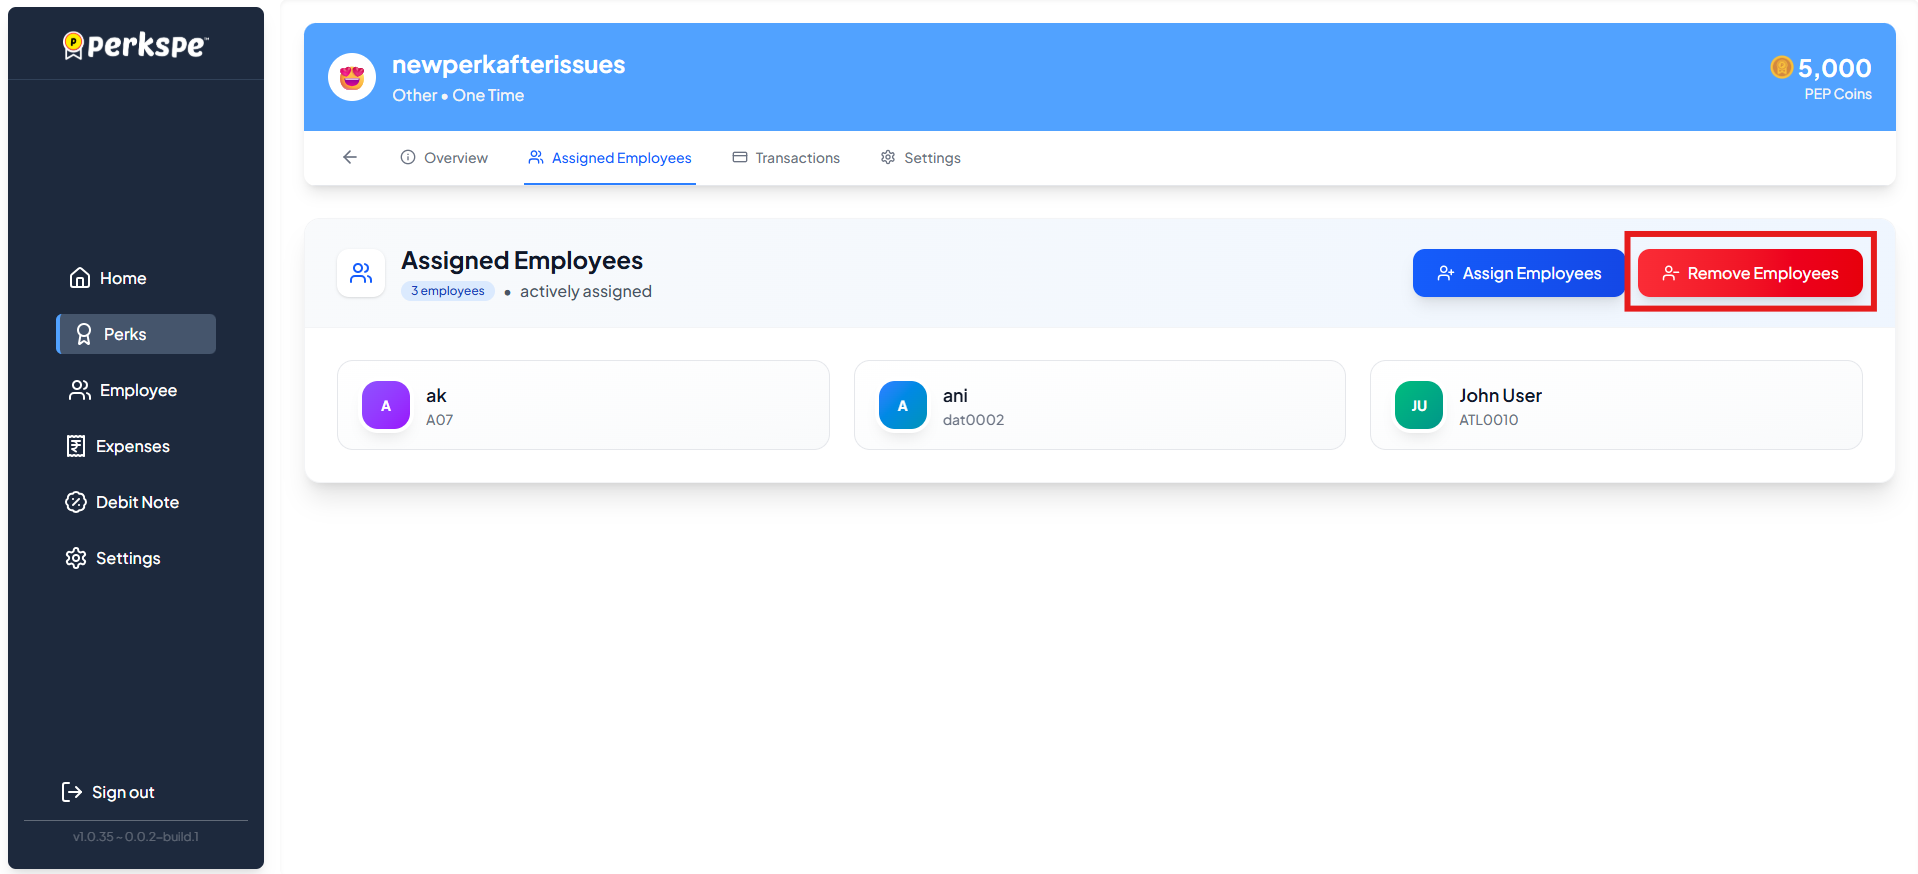
-
Click Remove Employees
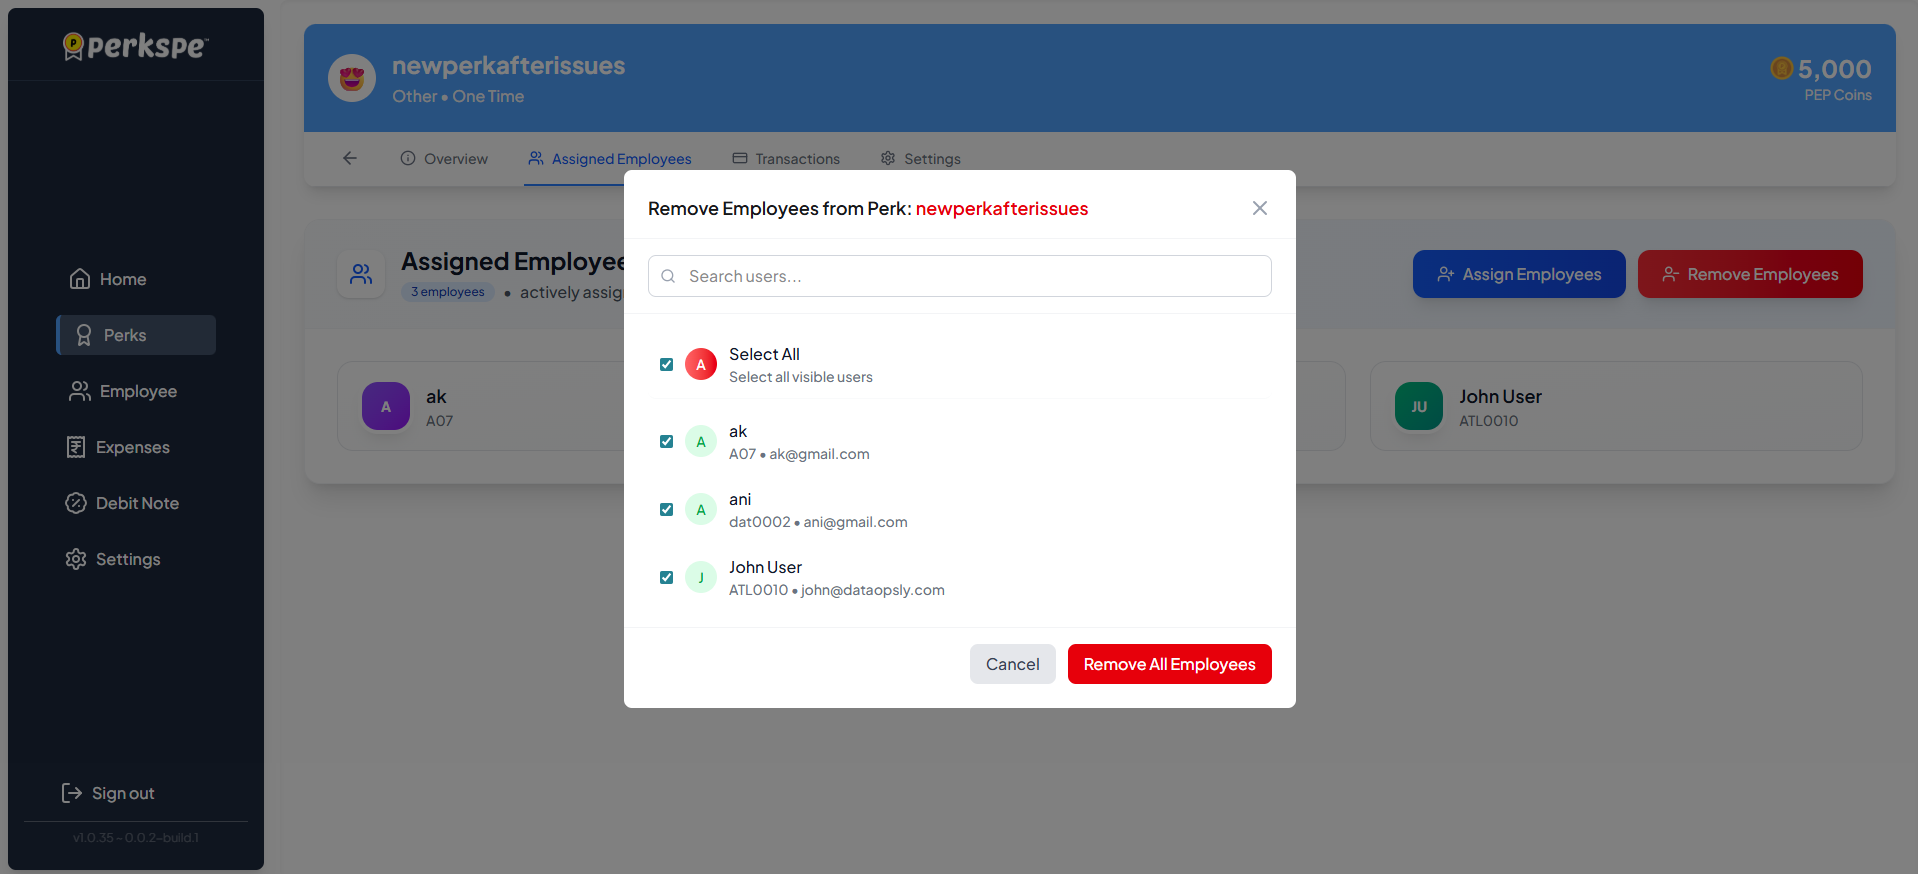
-
Select the employees to remove and confirm
How to Top Up Perk Balance
If a user needs additional perkscoins (e.g., they have exhausted their limit), employers can manually "Top Up" balance.
Note: This option is available only if the perk is already assigned to the user.
- Go to the perk's Assigned Employees tab
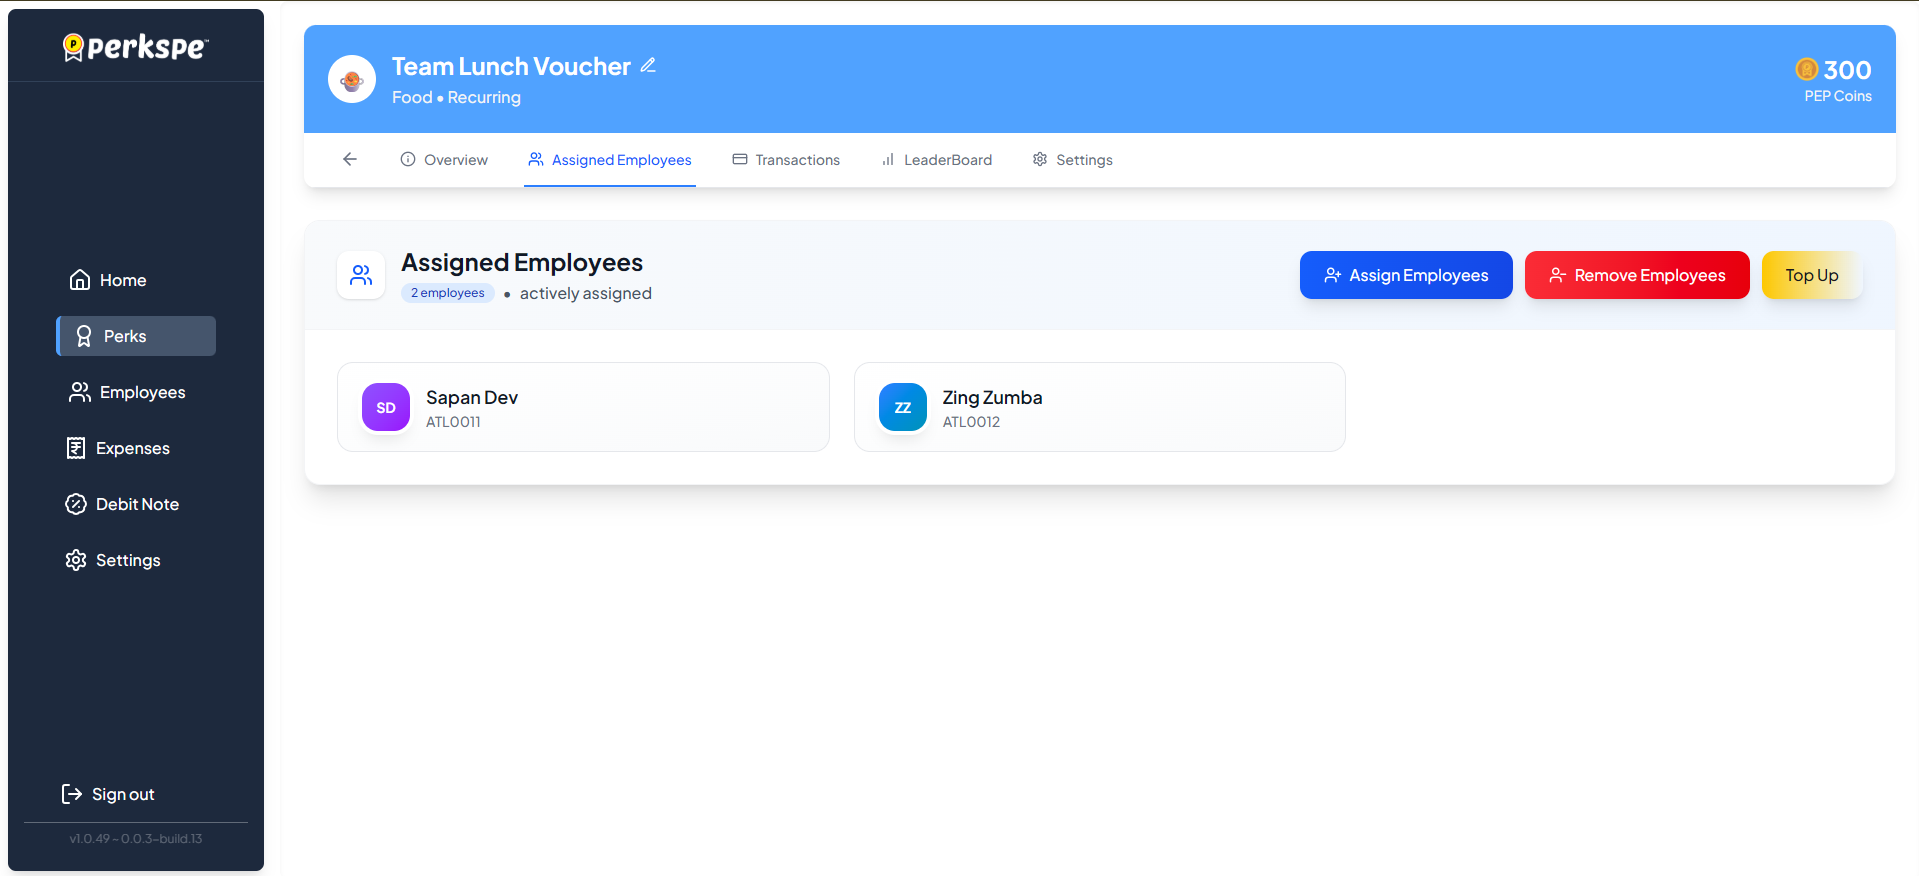
- Click the Top Up button

- Select the employees you want to top up
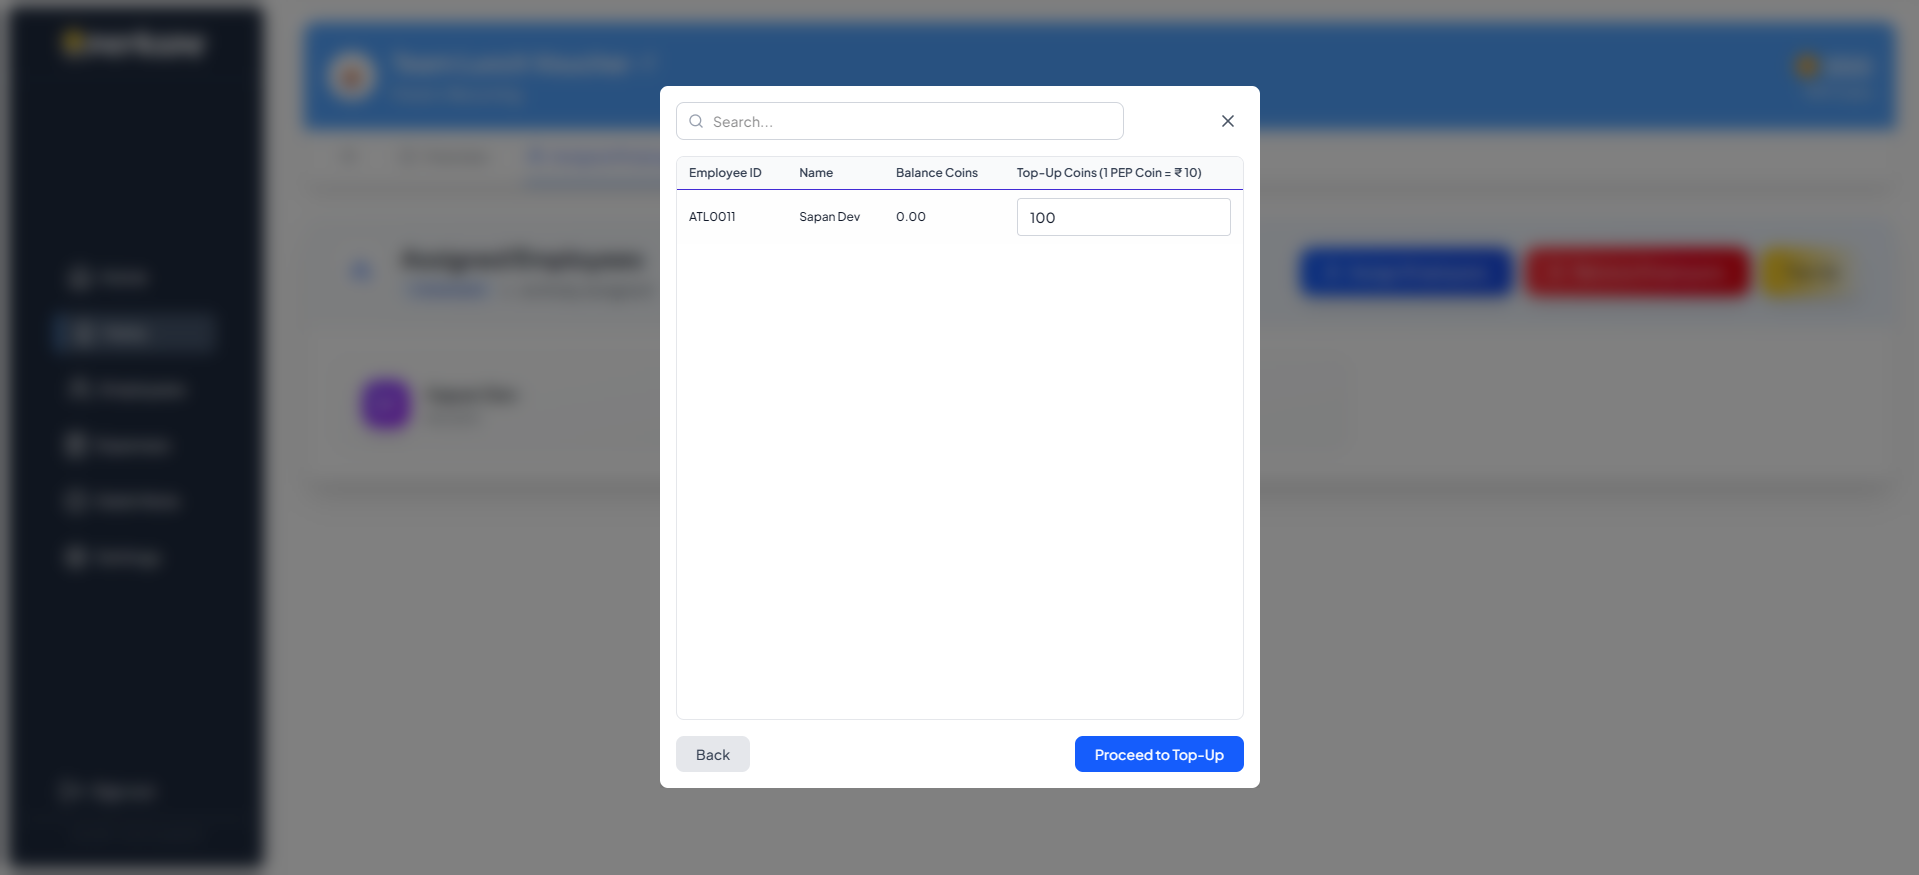
- Enter the amount of coins to add
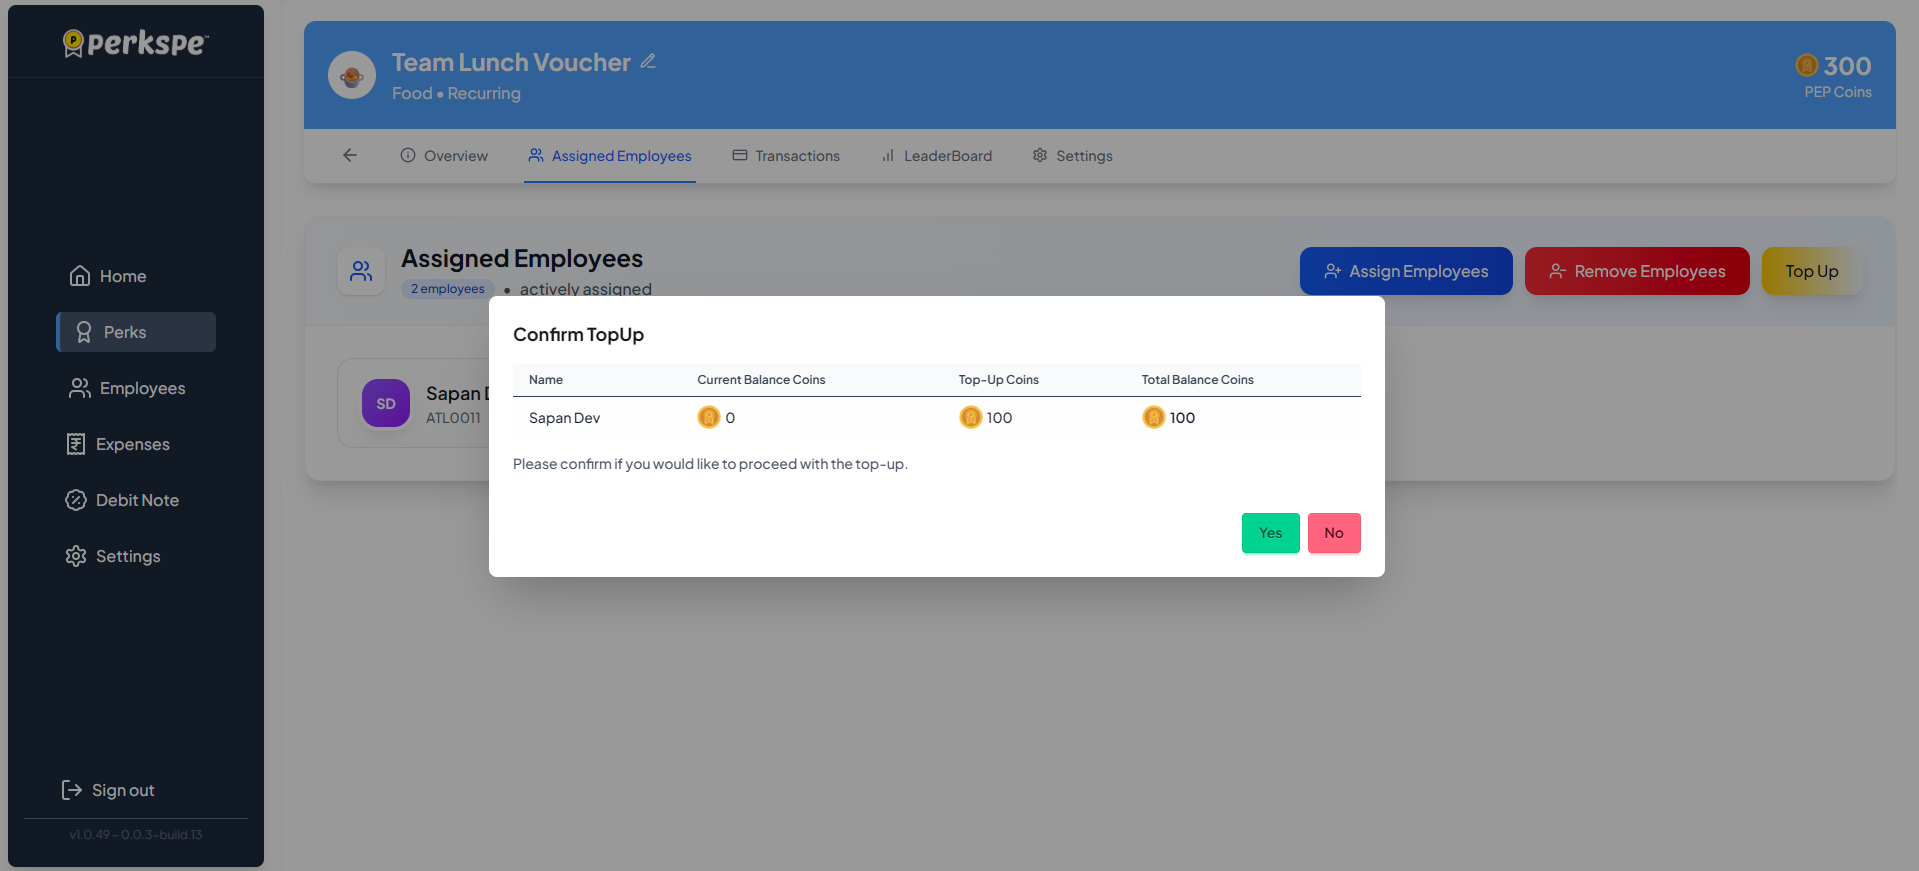
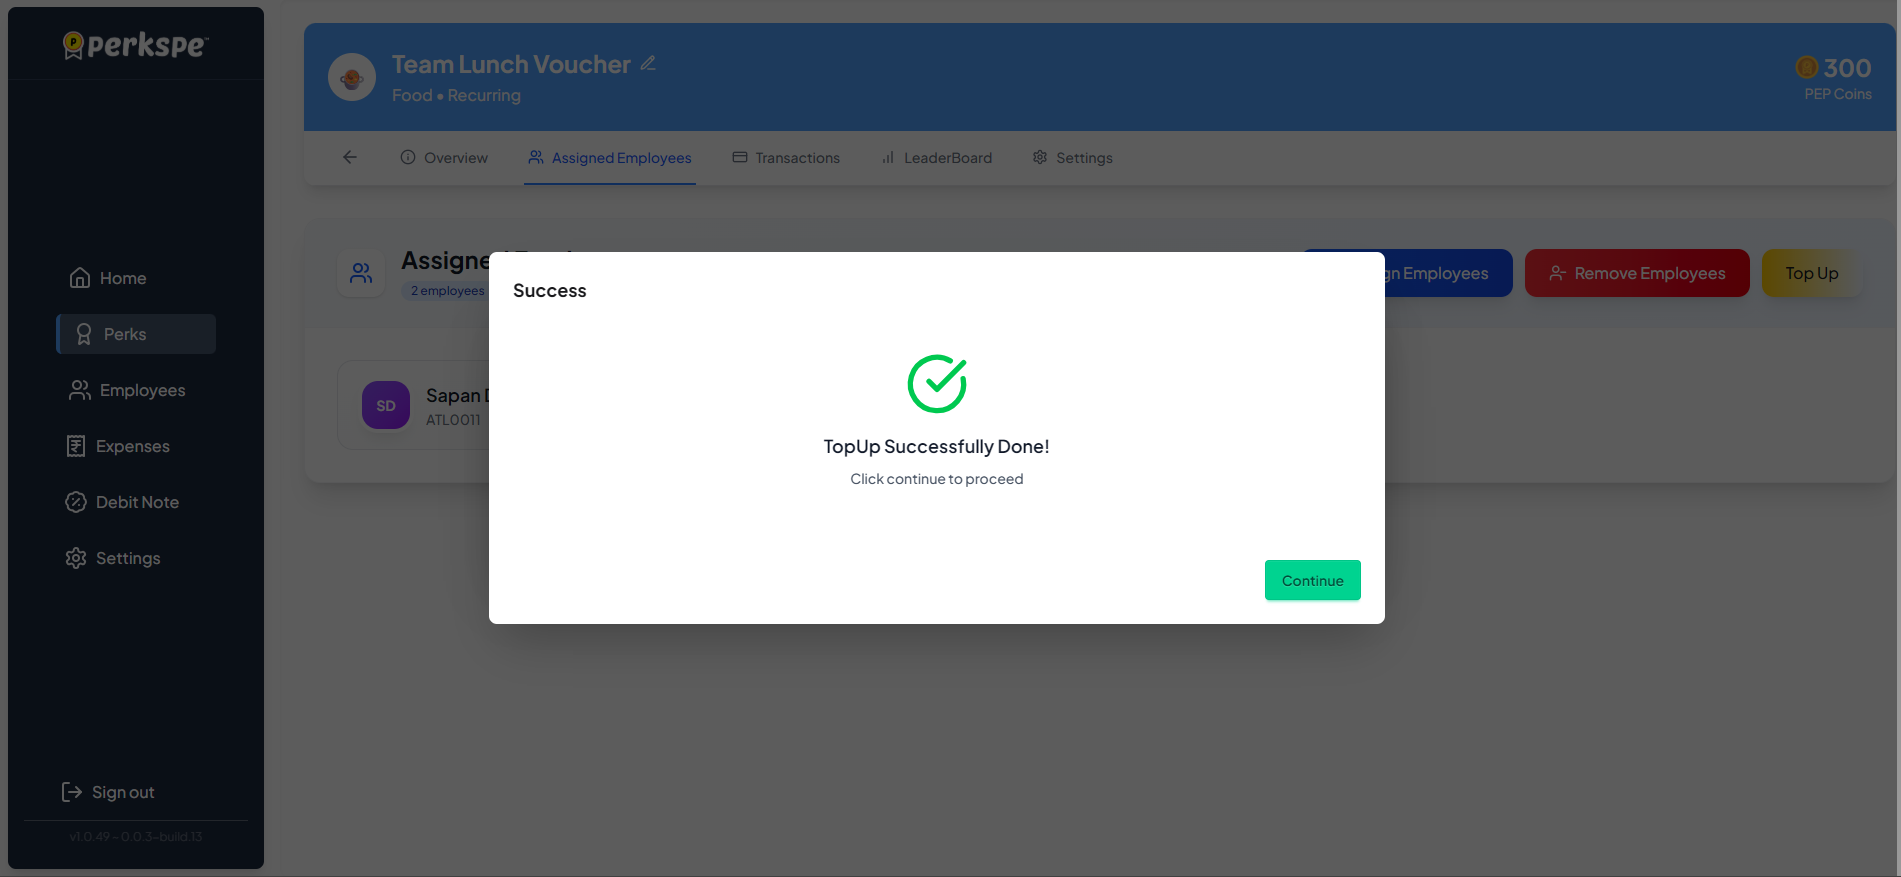
- Confirm the transaction
Tracking Perk Transactions
Monitor how PEP Coins are loaded and redeemed for each perk.
1. Transactions Overview
Navigate to the Transactions tab within a specific perk to see recent activity.
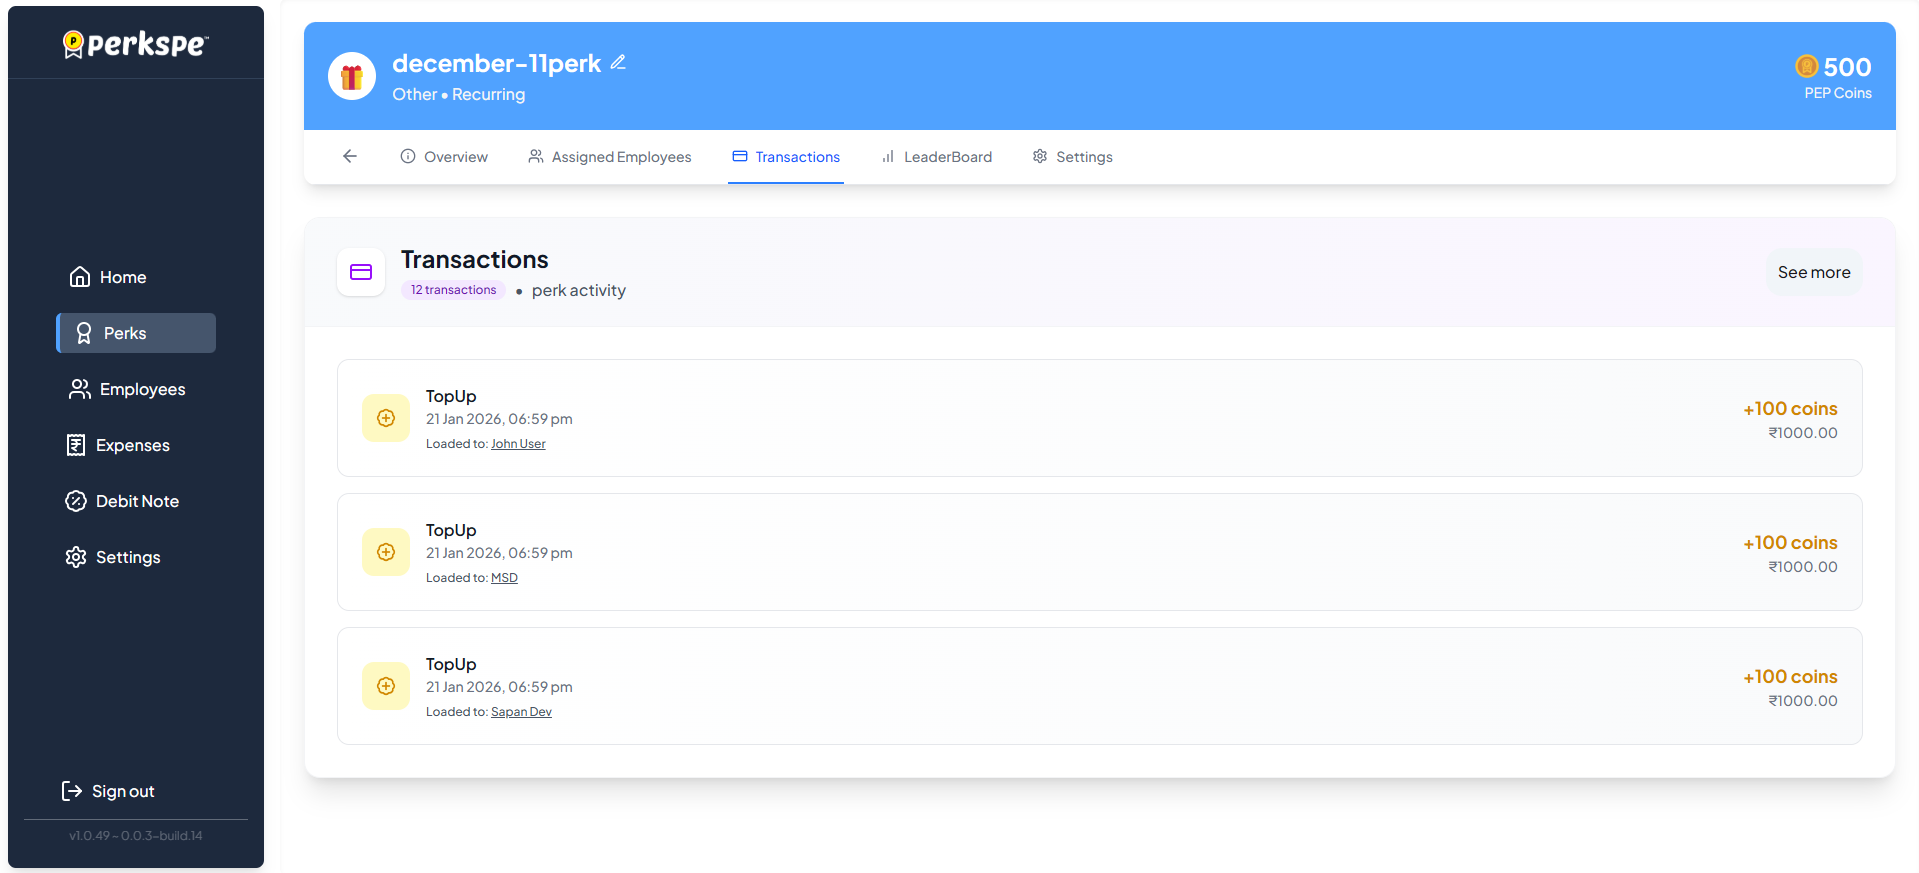
Transaction Types:
| Type | Description |
|---|---|
| Load | Coins added to an employee's account for this perk |
| Redeem To Card | Coins redeemed to the employee's RuPay card |
Click See more to view the full transaction history.
2. Detailed Coin Transactions
The detailed view provides a complete audit trail of all perk activity.

Audit Trail Details:
| Column | Description |
|---|---|
| Employee Name | The employee involved in the transaction |
| Type | Load (Green Up Arrow) or Redeem To Card (Red Down Arrow) |
| Coins | The coin value and its equivalent monetary value (e.g., +500 coins / ₹5000.00) |
| Transaction Date | The exact date and time of the activity |
| Balance | The remaining balance after the transaction (if applicable) |
Tools:
- Filters: Use the Filters button to search for transactions by specific employees, dates, or types.
- Refresh: Click Refresh to get the latest real-time transaction data.
Leaderboard
See which employees are utilizing their perks the most with the LeaderBoard tab.
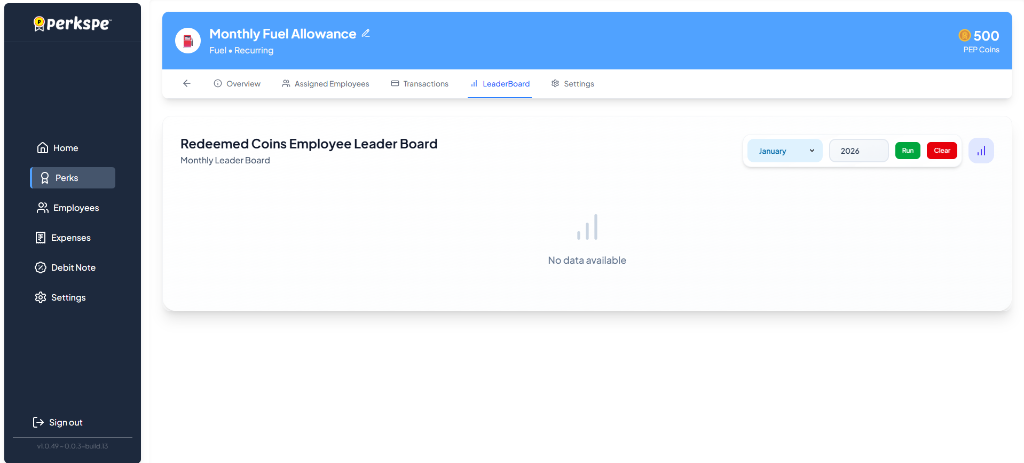
The LeaderBoard helps you:
- Track top redeemers for a specific perk.
- Filter data by Month and Year to analyze usage trends over time.
Quick Summary
| Action | Where to go |
|---|---|
| Create a new perk | Perks → Create Perk |
| Assign perk to employees | Perks → Select Perk → Assigned Employees |
| Assign perks to one employee | Employees → Select Employee → Perks |
| Remove employee from perk | Perks → Select Perk → Assigned Employees → Remove |